
Lesson Lab
The violin has a reputation for being punishing to start, and the reputation is half deserved. Half, because the difficulty is concentrated in a short window. For the first few weeks you're asking two hands to do unrelated jobs while an instrument balances on your collarbone and your ears tell you it sounds terrible. Get past that and the violin behaves like any other instrument: slow, steady, rewarding.
Almost every guide on how to play violin jumps to notes and tunes. This one deals with the part that actually decides whether you quit: the physical setup. Size, tuning, how you hold the thing, and how to get a sound out of it that isn't a scrape.
What you need, and what you don't
A beginner violin is sold as an "outfit", which means the violin, a bow and a case together. You'll also want:
- Rosin. Non-negotiable, and more on it below.
- A shoulder rest. Bridges the gap between the violin and your collarbone. Most people need one; a few are comfortable with a sponge or nothing.
- A clip-on tuner or a tuning app. Free apps are fine.
- A music stand, eventually. Reading music off a table wrecks your posture.
What you don't need: an expensive instrument, an electric violin, a metronome as a separate device, or a shoulder rest costing more than your rosin bill for a year. A modest student outfit that has been set up properly by a shop will serve you for a couple of years.
That phrase — set up properly — matters more than the price. A cheap violin with a badly cut bridge and pegs that slip is genuinely unplayable, and beginners blame themselves for it. If you order online, budget for a shop setup before your first lesson.
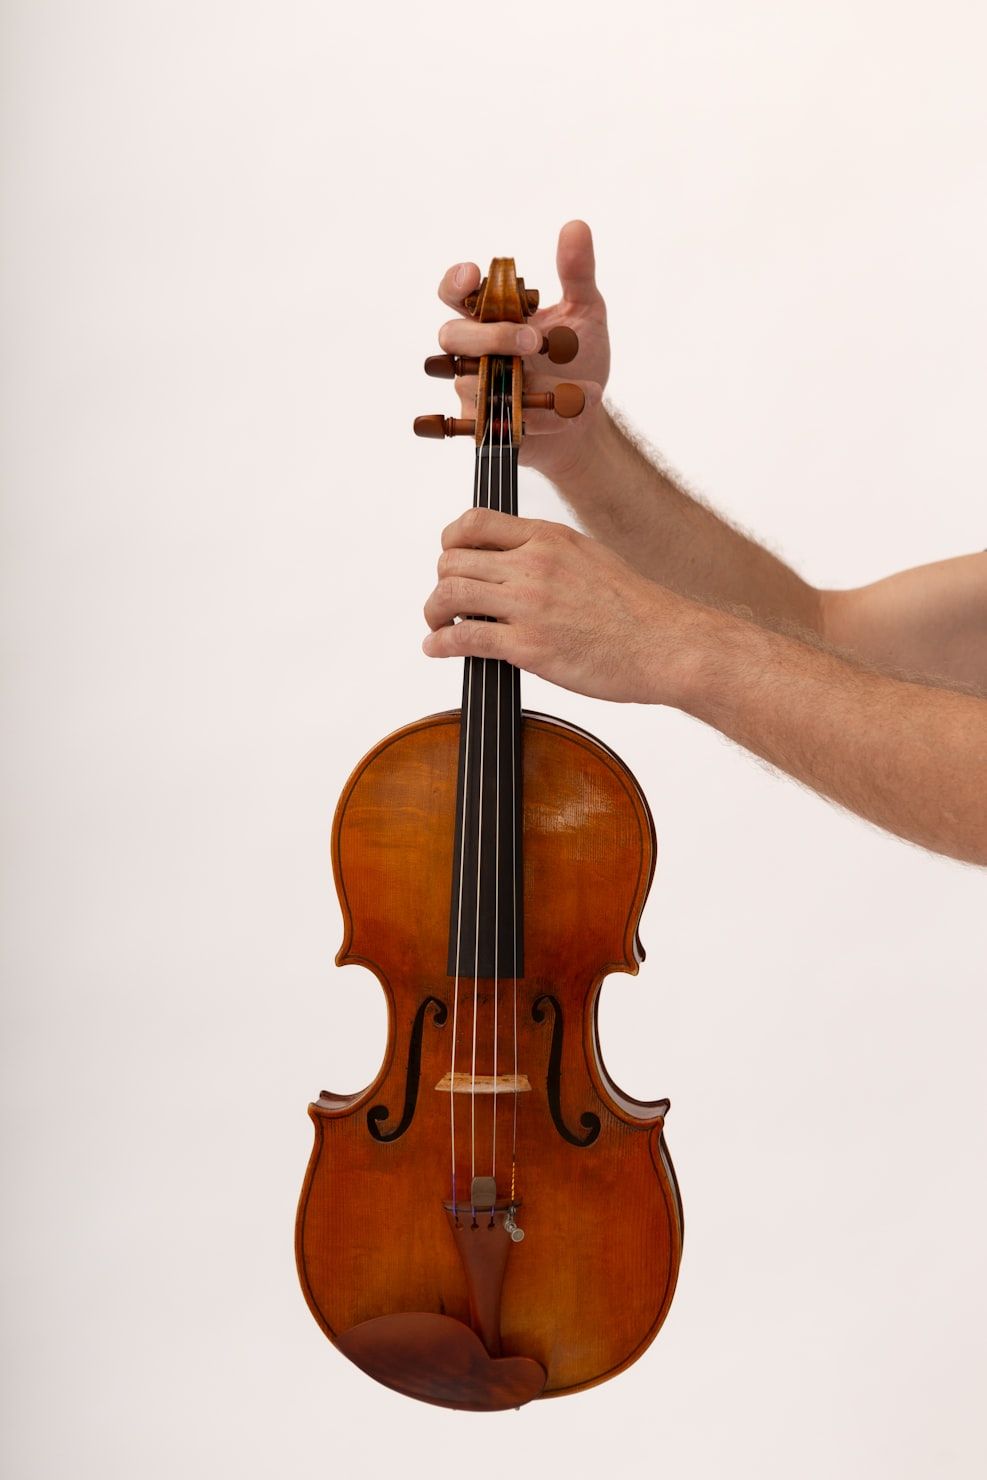
A beginner outfit is this, plus a bow, a case and a cake of rosin
👩🏫🎻 Buying blind? A teacher will tell you in one message whether an outfit is worth it and what setup it needs. Find your violin teacher on MOOZ → and book a trial before you spend anything.
Getting the size right
Violins come in sizes, and this is the one decision you can't fix with practice.
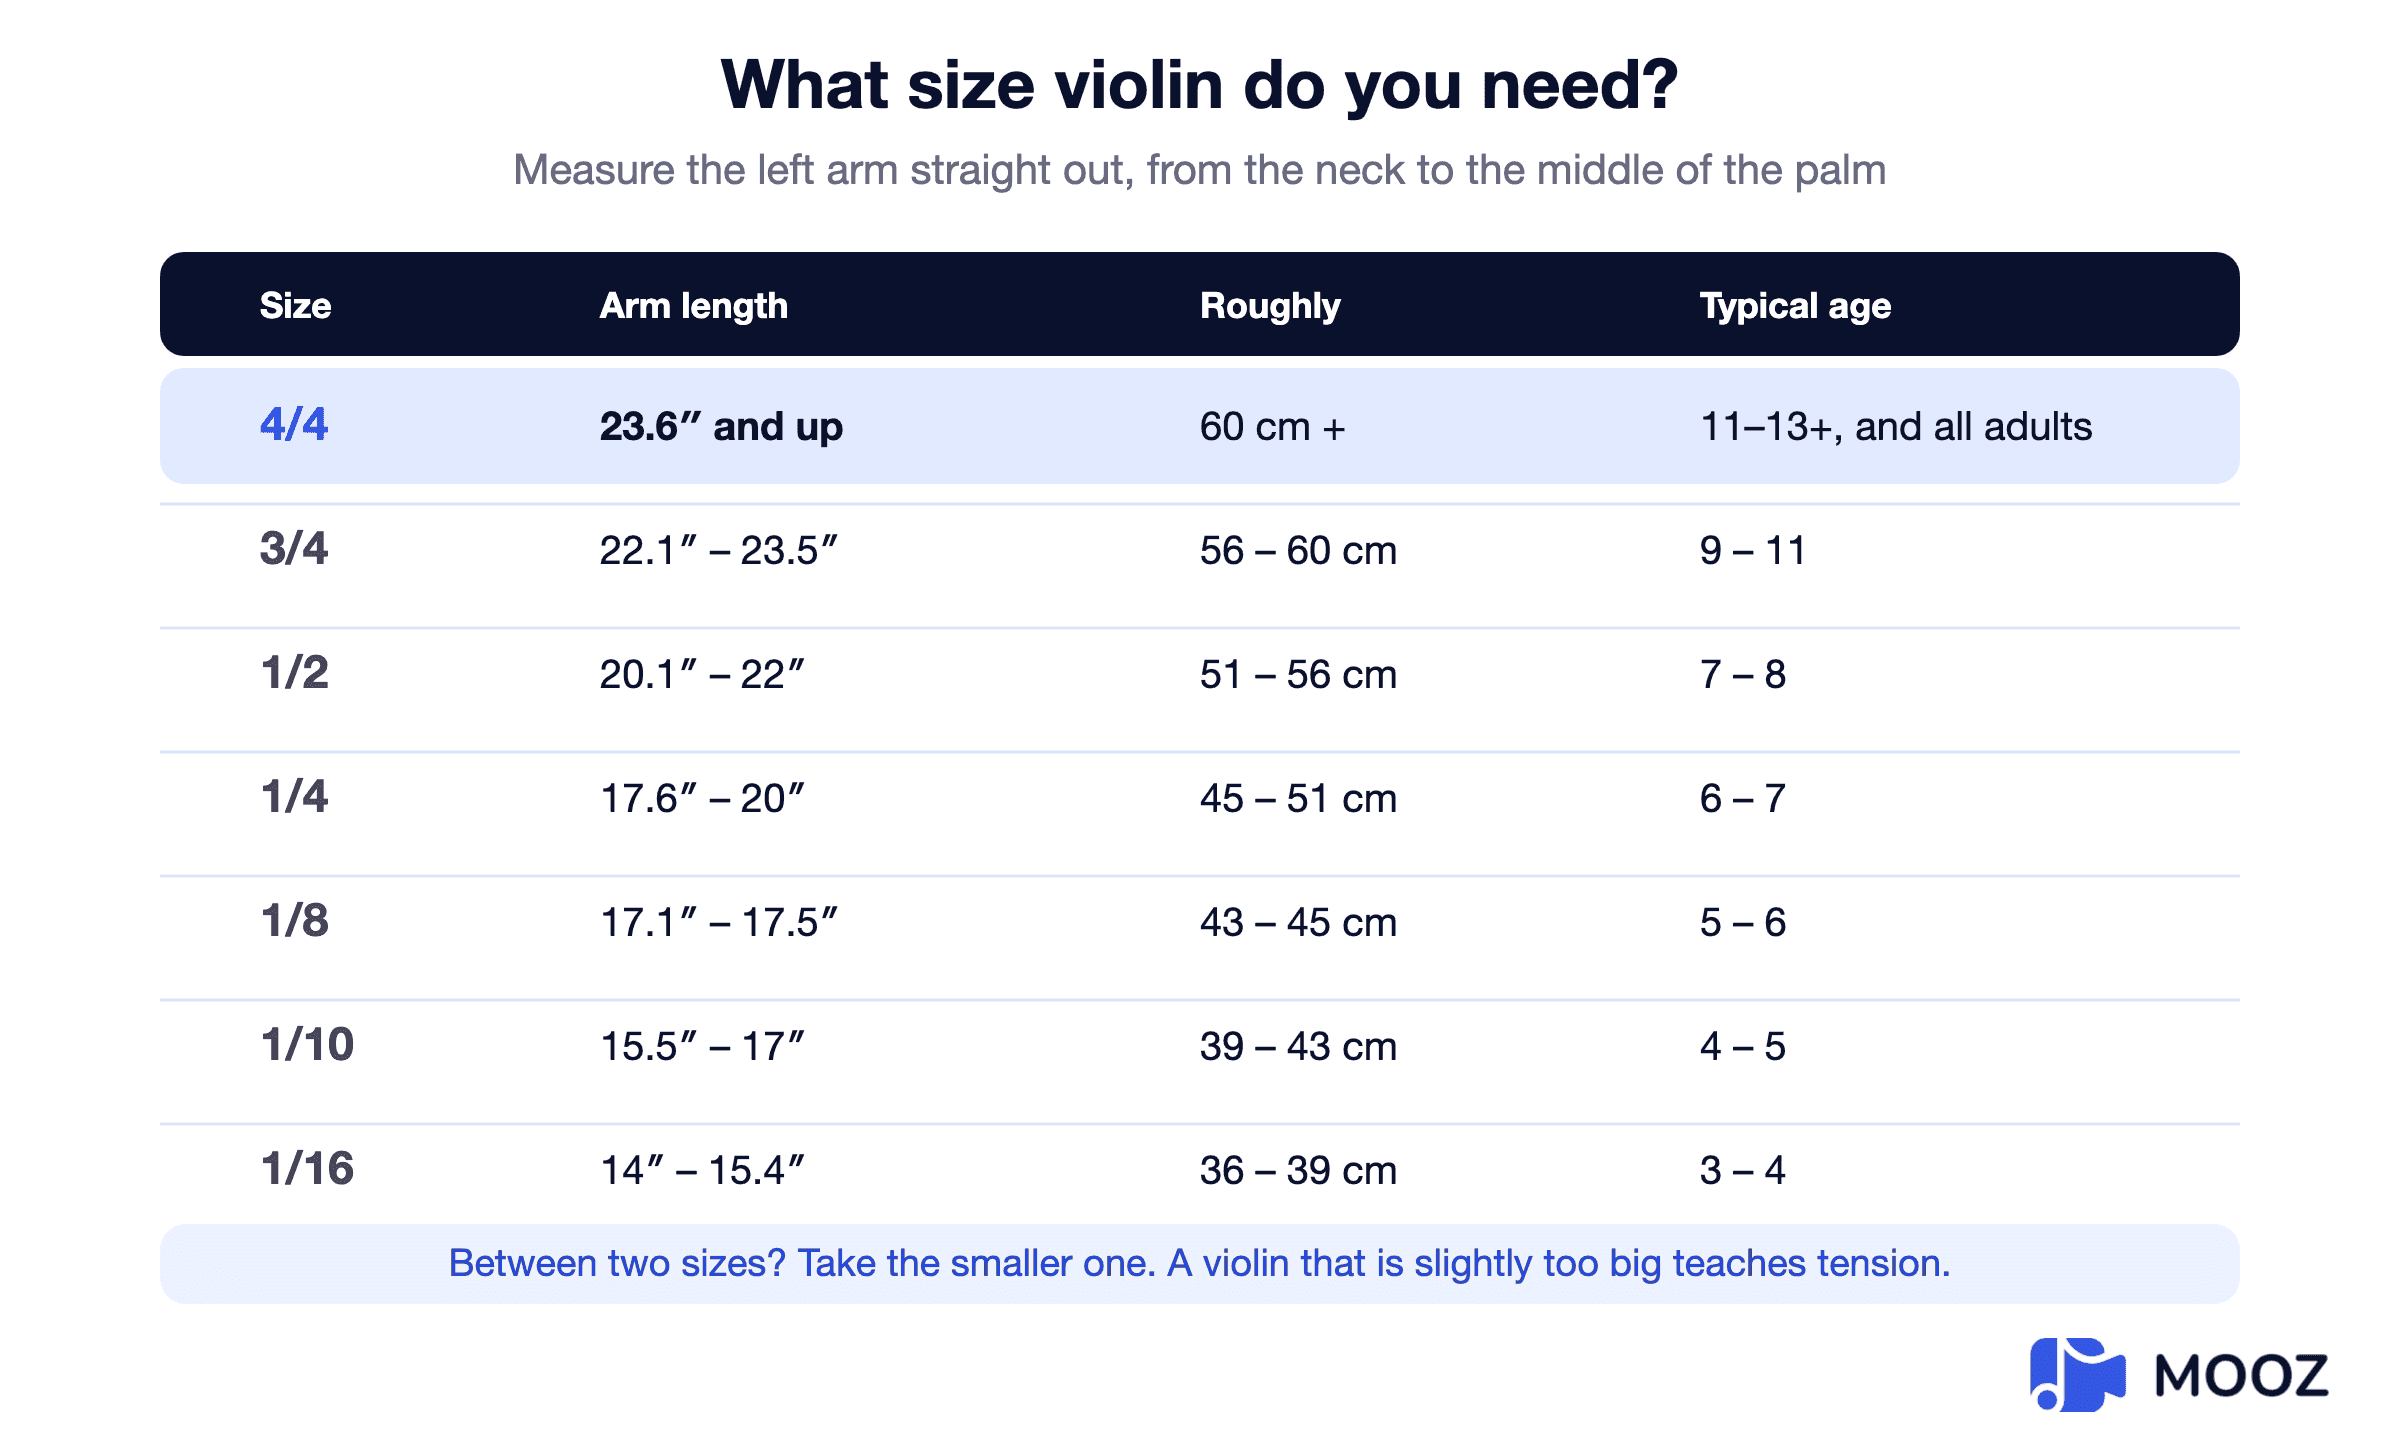
Violin sizes by arm length, measured from the neck to the middle of the palm
Measure the left arm straight out from the body, parallel to the floor, and measure from the neck to the middle of the palm. Match that against the chart. If you're an adult, you're almost certainly a 4/4 — full size — and you can skip the rest of this section.
For children the chart is a starting point, not a verdict. Two extra checks:
- The elbow test. With the violin on the shoulder and the scroll in the hand, the elbow should have a slight bend. A locked, straight arm means the violin is too big.
- The fingers test. The fingers should curl comfortably around the scroll.
Between two sizes, take the smaller one. A slightly small violin costs you nothing; a slightly large one teaches a stretched, tense left hand that takes months to unlearn. Sizes also differ a little between shops, so a five-minute fitting in person beats any chart, including mine.
Tuning, and why it comes before everything
The four strings, thickest to thinnest, are G, D, A and E.
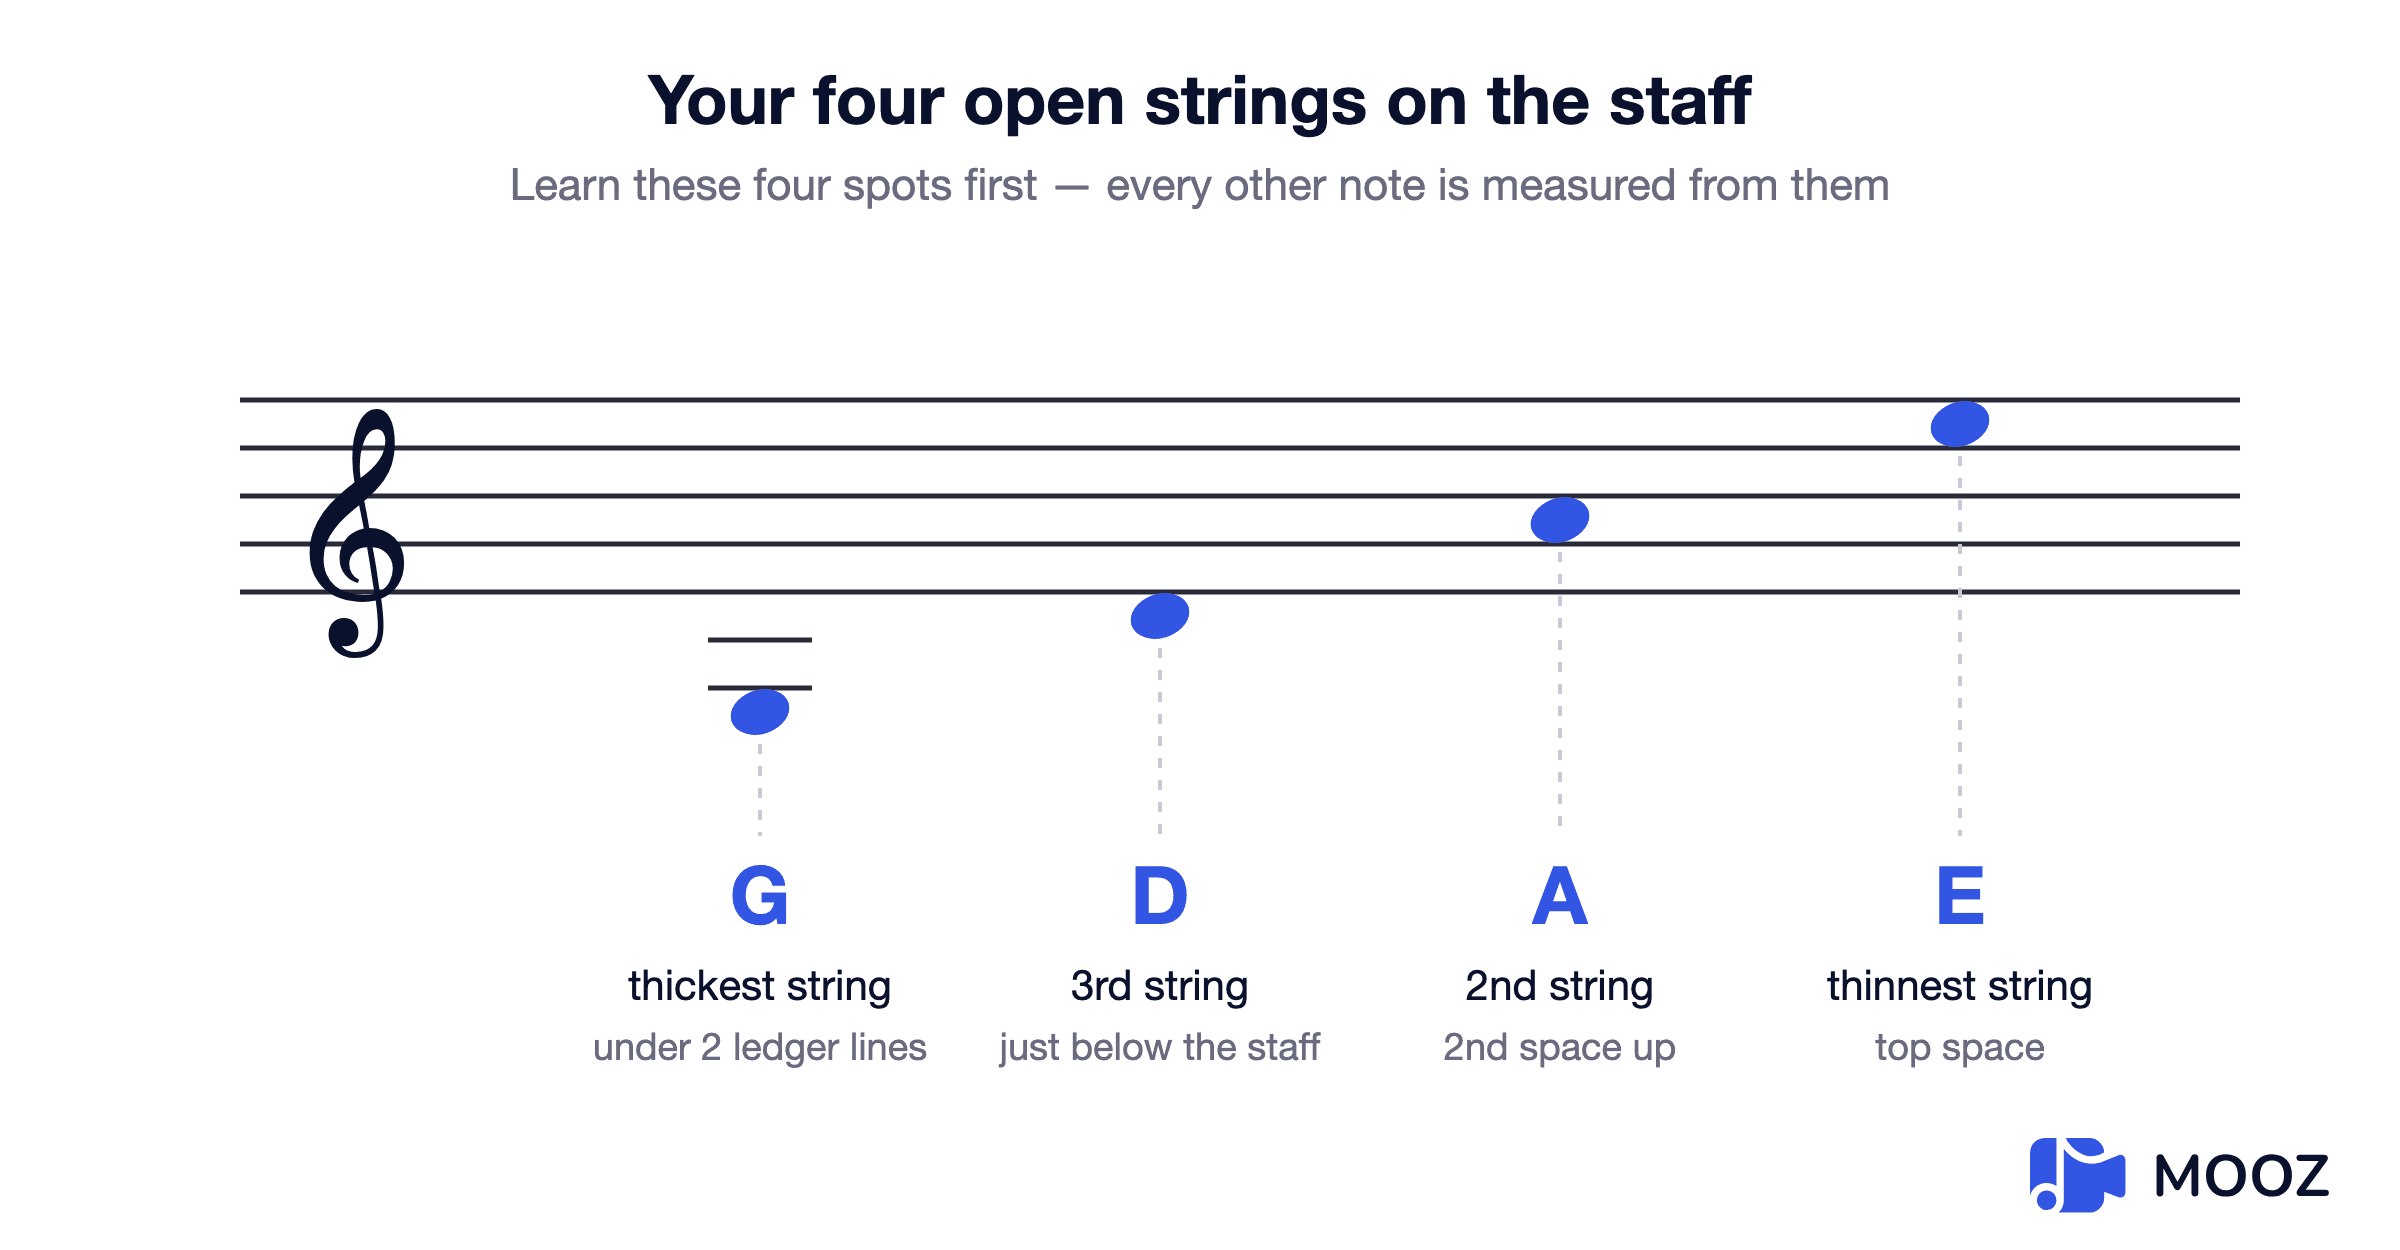
The four open strings, low to high: G, D, A and E
You will tune before every practice session, and for the first few weeks a new instrument will go flat every single day while the strings stretch. That's normal and it stops.
How it works:
- Fine tuners are the small screws on the tailpiece. Use them for small adjustments. Student violins usually have four; some have only one, on the E string.
- Pegs are for bigger corrections. The trick nobody mentions: push the peg gently into the hole while you turn it. A peg that keeps slipping is usually one that was turned without being pushed in.
- Tune upward to the note. If a string is sharp, go below the target and come back up. Strings hold their pitch better that way.
Use a clip-on tuner and check A first, then D, G and E. If you can't hear whether you're above or below the note yet, don't worry: the tuner is teaching your ear while it corrects the string.
Holding the violin
Stand up. Feet about shoulder-width apart, weight even, knees unlocked.
The violin sits on the collarbone, not the shoulder. Your jaw rests on the chinrest and holds it there with a small amount of weight — not a clamp. The shoulder rest fills the space underneath so you're not lifting your shoulder to meet the violin. That shrugged shoulder is the single most common beginner posture problem, and it produces neck ache within a week.
The scroll points slightly to the left and stays roughly level with, or a touch above, the chinrest end. Violins that droop toward the floor make everything the left hand does harder.
The check: you should be able to hold the violin with your jaw alone, hands off, without gripping. If it slides the moment you let go, either the shoulder rest is the wrong height or your head is doing nothing.
Your left hand then arrives with no job except the fingers. The thumb rests lightly on the side of the neck, the wrist stays out of it — no collapsing so the wrist touches the neck — and the fingers curve over the strings from above.
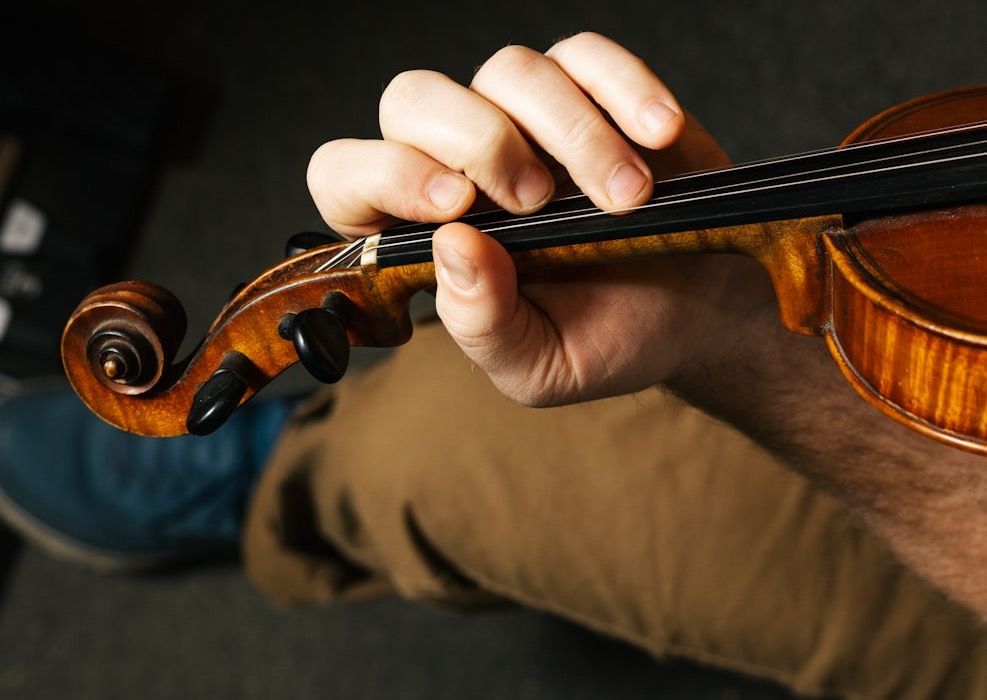
The left hand: thumb light on the side of the neck, fingers curving over the strings from above
The bow: rosin first, then the hold
Rosin a new bow properly before you expect any sound. A brand-new bow has none on it, and bare horsehair slides across the string almost silently. Beginners think the violin is broken. Run the rosin cake up and down the hair fifteen or twenty times, and after that a few strokes before each session is plenty.
The bow hold, briefly:
- The thumb bends, and its tip sits in the little notch where the frog meets the stick. A straight, locked thumb is the root cause of most bow tension.
- The middle two fingers drape over the stick.
- The index finger contacts the stick around its second joint and supplies the weight.
- The little finger stays curved and sits on top of the stick. It balances the bow, and it should never be flat and stiff.
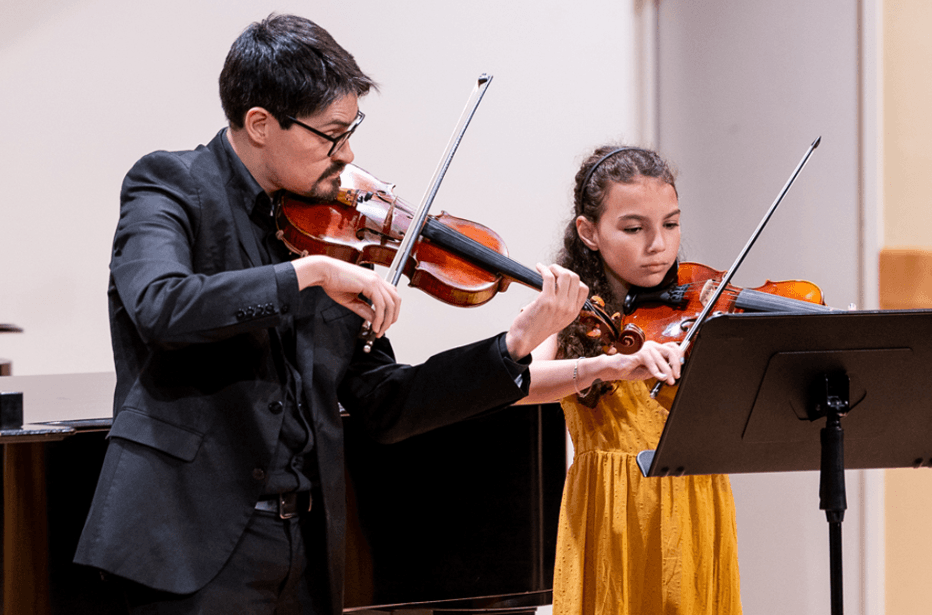
A teacher checking bow hold and posture up close, which is what a first lesson is mostly for
Then three variables control every sound you make:
- Where you bow. Between the bridge and the end of the fingerboard, closer to the bridge for a fuller sound.
- How fast. More speed, more sound.
- How much weight. From the arm, not by squeezing.
Keep the bow parallel to the bridge. This is the thing to check in a mirror, every session, for months. Bows drift diagonally on their own, and a diagonal bow makes the string sound thin no matter what else you do.
The diagnostics are simple once you know them: a scratch means too much weight or too little bow speed. A whistle or a thin, glassy sound means the opposite, or that you've wandered over the fingerboard. A squeal on string changes usually means the arm stopped halfway between two string levels.
Your first month
Beginners try to learn the left hand and the right hand at once, and end up doing both badly. Separate them.
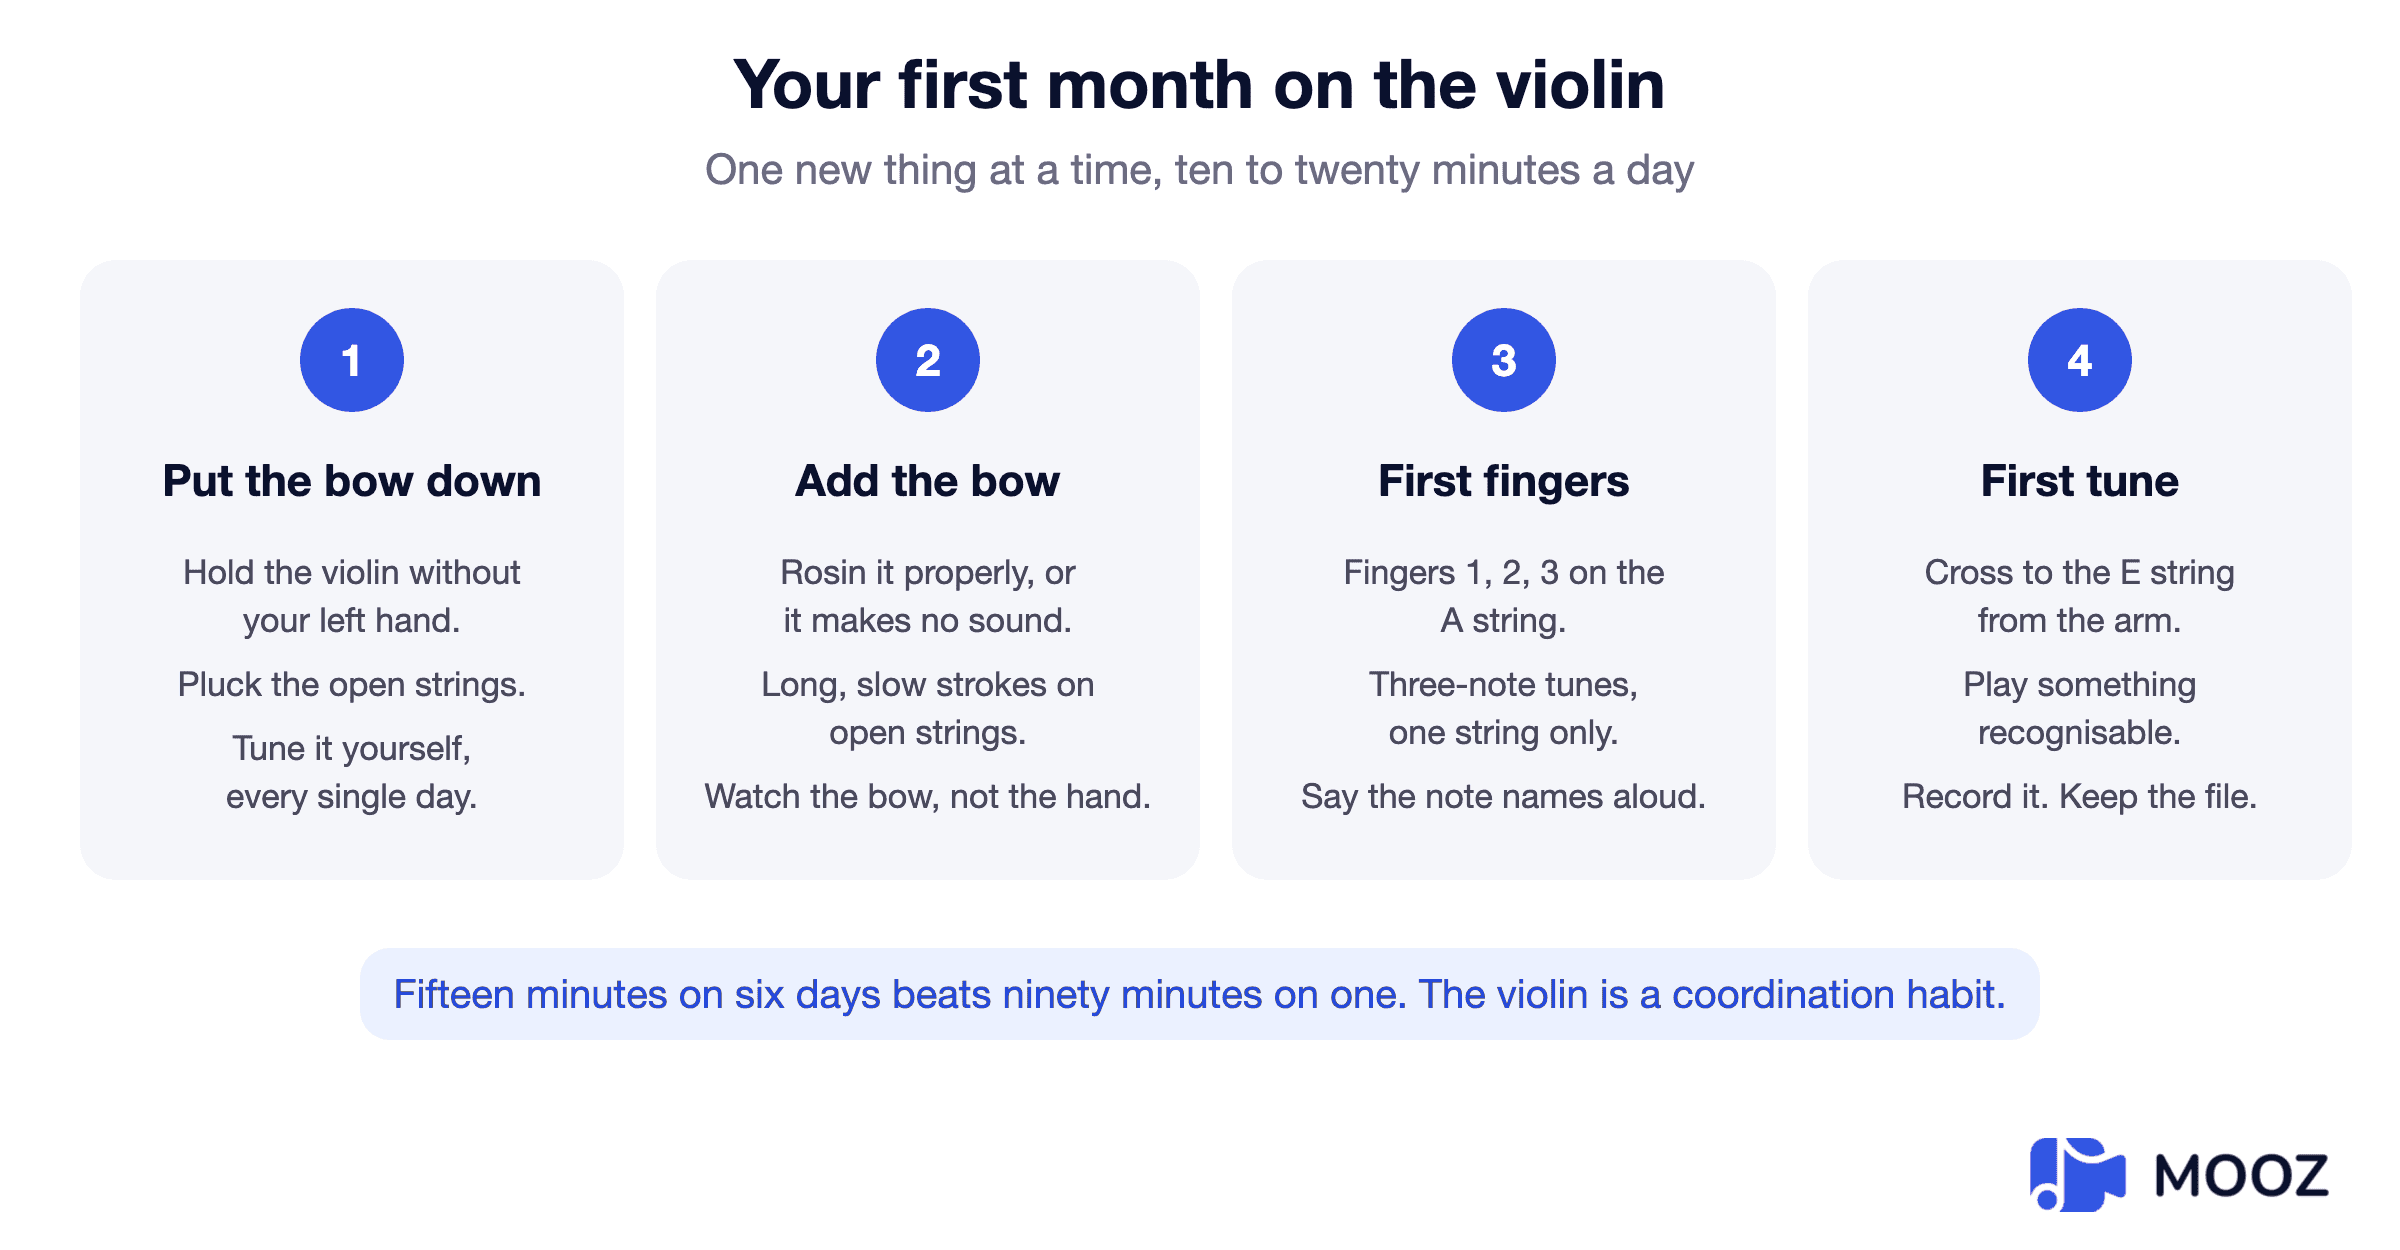
A four-week beginner plan: one new skill per week, ten to twenty minutes a day
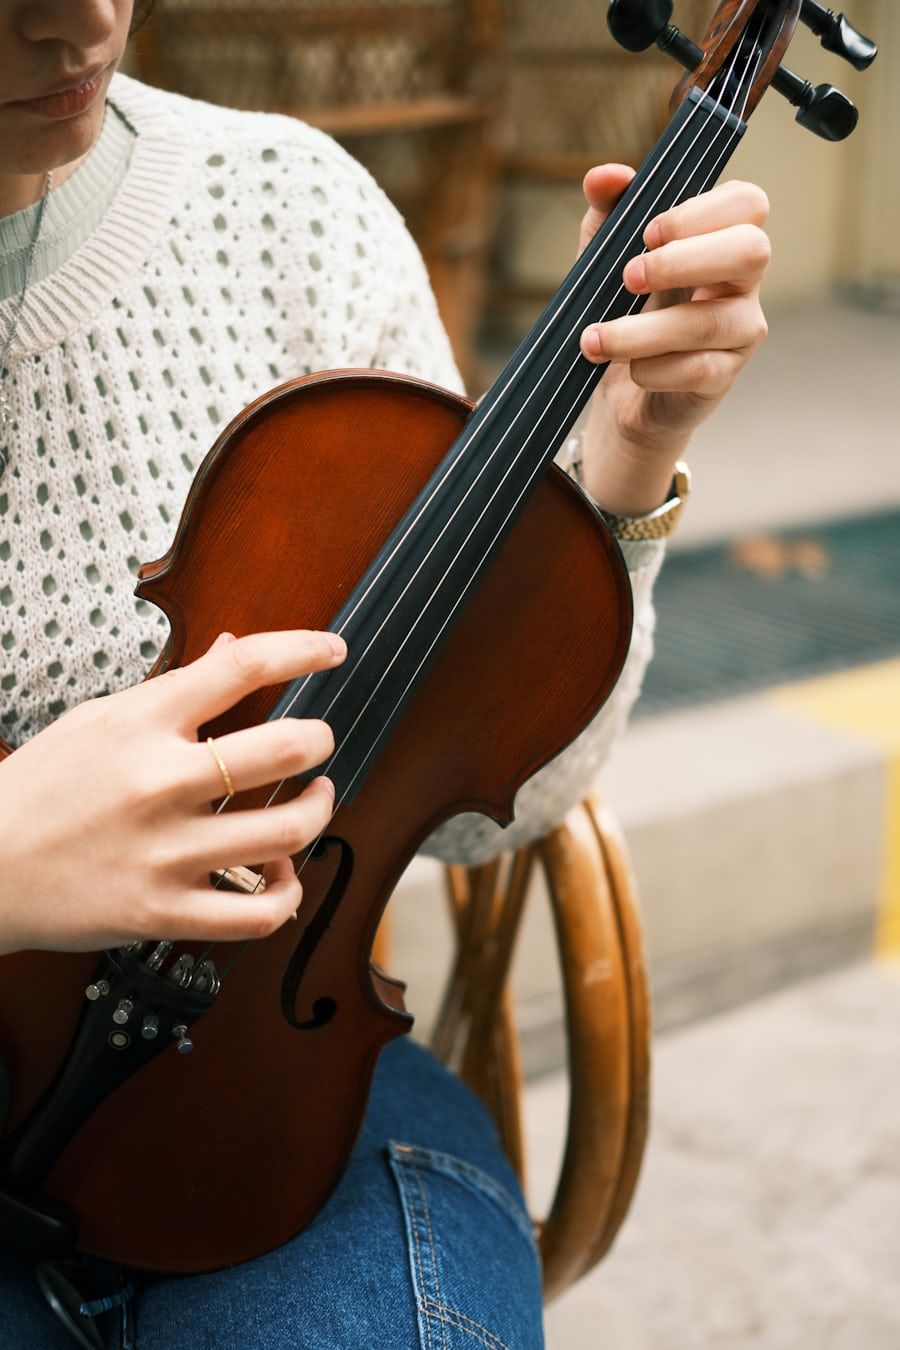
Strings plucked, bow still in the case — that is the whole of week one
Week one has no bow in it at all. That feels like a waste and it isn't: plucking open strings while you get used to holding the instrument means that when the bow does arrive, you only have one new problem instead of three.
Ten to twenty minutes a day, most days. Long weekend sessions build less than short daily ones, because what you're training is coordination, and coordination consolidates with repetition and sleep rather than duration.
First fingers, first notes
Once the bow is behaving, the left hand starts. Everything for the first year lives in first position, where the hand sits closest to the scroll and doesn't move.
The shape most beginner music uses has what teachers call a high second finger, and it maps out like this:
G string    0 = G    1 = A    2 = B     3 = C
D string    0 = D    1 = E    2 = F#    3 = G
A string    0 = A    1 = B    2 = C#    3 = D
E string    0 = E    1 = F#   2 = G#    3 = A
A zero means the open string. Notice that the third finger on each string plays the same letter as the string above it, so your hand is doing the same shape four times over rather than four different shapes.
On fingerboard tapes: teachers disagree. They give quick results and a reliable frame, and they can become something the eyes depend on instead of the ears. A reasonable middle path is tapes for the first few months, removed once the hand knows where it's going. Ask your teacher, and follow their preference rather than mixing methods.
For the notes on the page and how they map to your fingers, we went through it properly in violin notes for beginners. If notation itself is new to you, how to read sheet music starts a step earlier and applies to every instrument. And when you want something to play, the tunes in easy violin songs for beginners all stay in this one hand shape, which is exactly what you want early on: new music, no new technique.
Why beginners sound bad, and what fixes it
Everyone sounds rough for the first month or two. These are the specific causes, roughly in order of how often they're the culprit:
- A crooked bow. Fix in a mirror, one minute per session.
- Too much left-hand grip. If your thumb hurts, you're squeezing. The violin is held by the jaw, not the hand.
- A shrugged shoulder. Lower it deliberately, and check the shoulder rest height.
- Bowing too close to the fingerboard. It feels safer and sounds thin.
- No rosin, or far too much. Too much makes a gritty, crunchy sound and a dusty violin.
- Playing too fast. Almost every intonation problem sounds better at half speed, which tells you it was never an ear problem.
How long does it take?
Honest ranges, assuming daily practice and a teacher:
- A recognisable tune: two to four weeks.
- A tone you don't wince at: six to twelve months.
- Playing in tune reliably in first position: around a year.
- Vibrato: usually after a year or more, and no sooner, because it needs a relaxed hand that isn't holding the violin up.
- Shifting out of first position: typically in the second year.
Adults tend to move faster than children through the understanding and slower through the physical habits, and they quit more often — not from lack of ability, but from impatience with the sound they're making in month two.
Do you need a teacher?
For most instruments I'd say it depends. For violin, in the first six months, it's close to a straight yes.
The reason is specific rather than snobbish. The violin has no frets and no keys, so nothing on the instrument tells you when you're wrong: it just sounds slightly off, and slightly off becomes normal within a fortnight. Bow angle, wrist collapse, a creeping shoulder and a locked thumb all feel completely fine from the inside while they quietly become permanent.
🎻👀 Crooked bow, collapsed wrist, creeping shoulder, locked thumb — all four feel fine from the inside. Browse verified violin teachers on MOOZ → and have someone check yours.
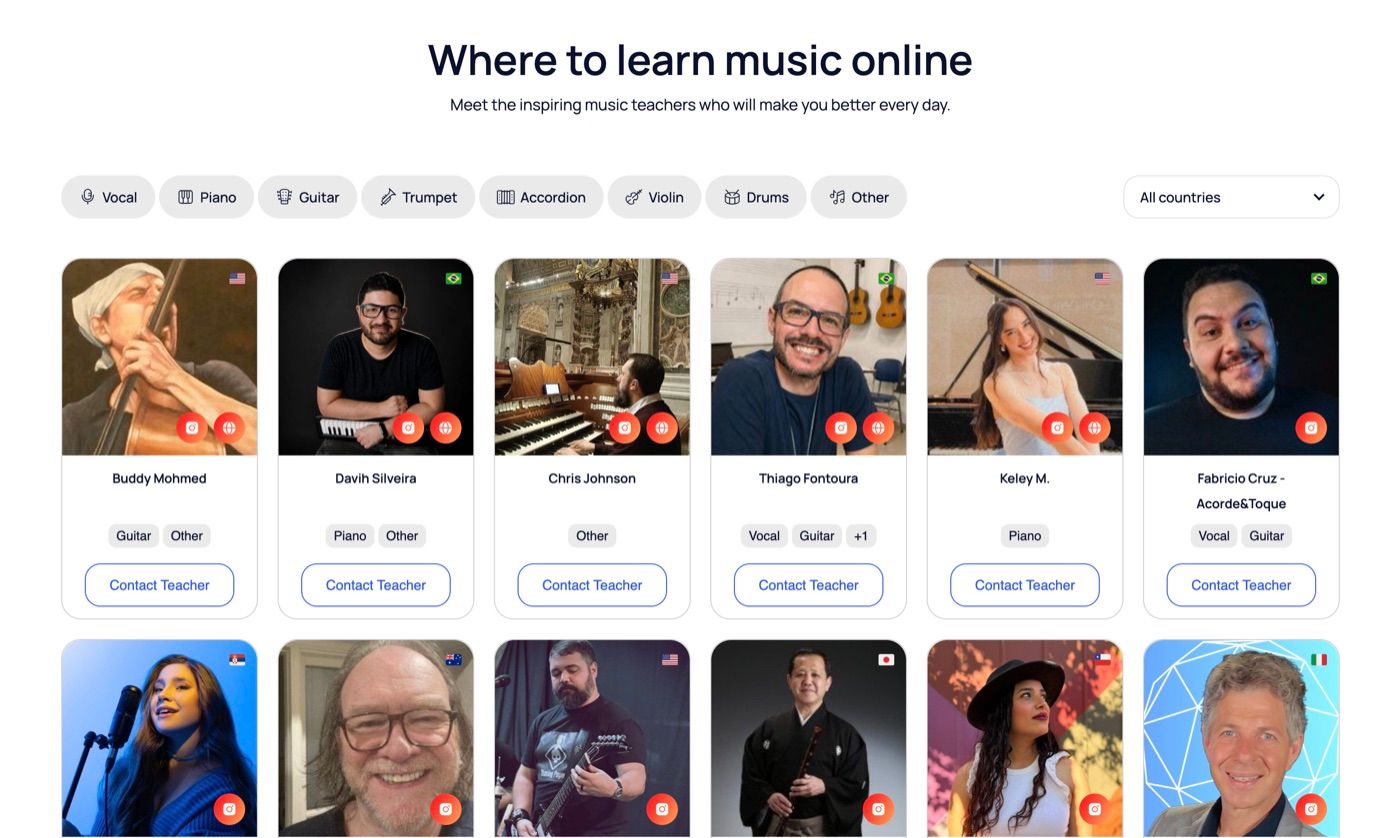
Browse verified violin teachers on MOOZ and filter by level and price
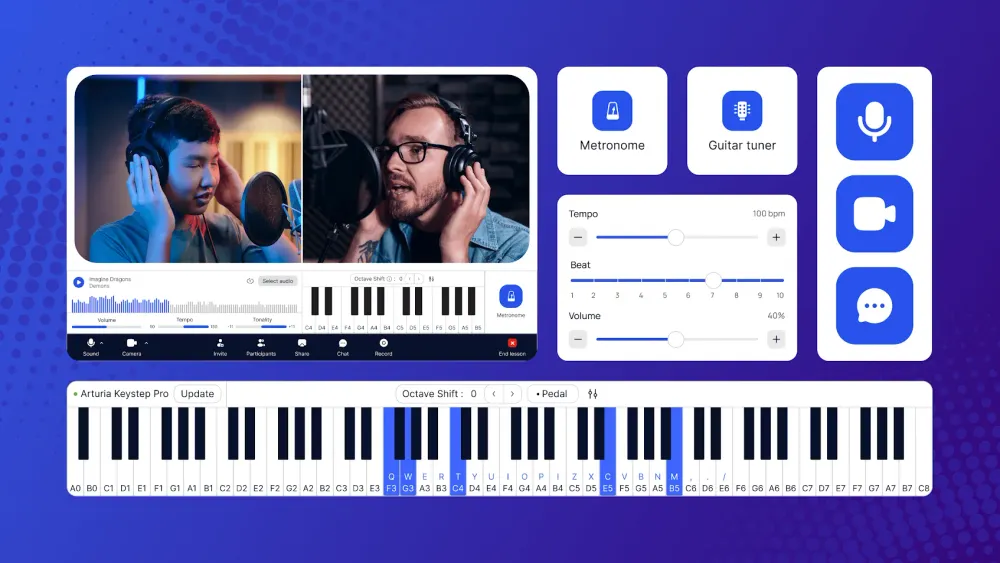
A teacher watching for ten minutes catches all four. If you're deciding between local lessons and online ones, we compared them in private violin teacher vs online classes. On MOOZ you can browse verified violin teachers, filter by level, language and price, and book a trial lesson. Lessons run in a platform built for music rather than a general video call, which matters more on violin than almost anywhere else: ordinary calls compress exactly the frequencies that tell a teacher whether your tone is healthy.
FAQ: learning the violin
Is the violin hard to learn?
It's hard to start and normal after that. The first weeks are unusually demanding because there are no frets, both hands do different jobs, and you're holding the instrument with your head. Progress after that looks like any other instrument.
Can adults learn the violin from scratch?
Yes. Adults learn the theory faster and the physical habits slower, and the main risk is impatience rather than age. Full size, 4/4, for essentially every adult.
How much should a beginner practise?
Ten to twenty minutes a day, most days, beats one long weekly session comfortably. Short and frequent is how coordination gets built.
Do I need to read music to play the violin?
Not in the first weeks — finger numbers will carry you. Reading becomes worth it quickly, though, because most violin music for beginners is written in standard notation rather than tabs.
What size violin do I need?
Measure the left arm from neck to middle of palm and check the chart above. Adults and most teenagers take 4/4. When in doubt, size down.
Why does my violin sound scratchy?
Almost always bow weight, bow speed or contact point, in that order. A crooked bow is the next suspect. It is very rarely the instrument.
Should I buy or rent a violin?
Rent for a growing child, since sizes change every year or two. For an adult starting on a 4/4, a decent student outfit with a proper shop setup is usually the better buy.
Start with the boring things
The parts of this guide that feel like preamble — size, rosin, tuning, how the violin sits on your collarbone — are the parts that decide how the next year goes. Nobody quits the violin because a piece was too hard. They quit because it hurt their neck, or it never stopped sounding scratchy, and both of those are setup problems with known fixes.
Get those right in month one and the instrument stops fighting you.
Sources
- Violin size ranges adapted from the Fiddlershop violin sizing guide, measured from the neck to the middle of the palm with the arm extended. Sizing varies slightly between makers and shops.
Related Articles

Synchronization in Online Music Lessons: A Complete Breakdown
Learn how tech fixes internet latency. Make synchronous music today!
How to Start Your First Lesson in MOOZ: A Step-by-Step Guide
Read MOOZ step-by-step guide to make your first class smooth, professional, and perfectly in tune.

Guide to Teach Music Online Smarter: MOOZ & Moosiko Insights
Learn how to solve the 5 biggest online teaching challenges that are costing you time and students.