Inside MOOZ

Hey music teachers! Let's be honest, teaching online with apps made for business meetings can be... frustrating. Your piano sounds tinny, the video freezes, and trying to share sheet music is a chore.
What if there was a platform that gets us? Meet MOOZ – it’s like a custom-built studio for online music lessons. It’s all about making your lessons feel powerful, personal, and perfectly in tune.
Ready to feel the difference? Let’s set up your first music lesson in MOOZ in just a few minutes!
Step 1: Download the App
Download and install the app. MOOZ works only as a downloadable app on any device — your laptop, tablet, or phone (Windows, MacOS, Linux, IOS or Android). No fancy tech required. Download the app, install, and you're seconds away from starting.
💡 For the best experience, use the desktop app. It provides full access to all music teaching tools. Your phone's screen is just too small for some of our coolest tools, like the digital piano.
Step 2. Sign Up in the MOOZ app
Sign-up in the MOOZ app. Create an account and select your role as a Teacher or Student. Your role defines your dashboard in the app view and available features.
Once you're in, you'll see a clean, intuitive dashboard. Everything is right where you need it. This isn't a complicated control panel; it's your new music teaching hub.
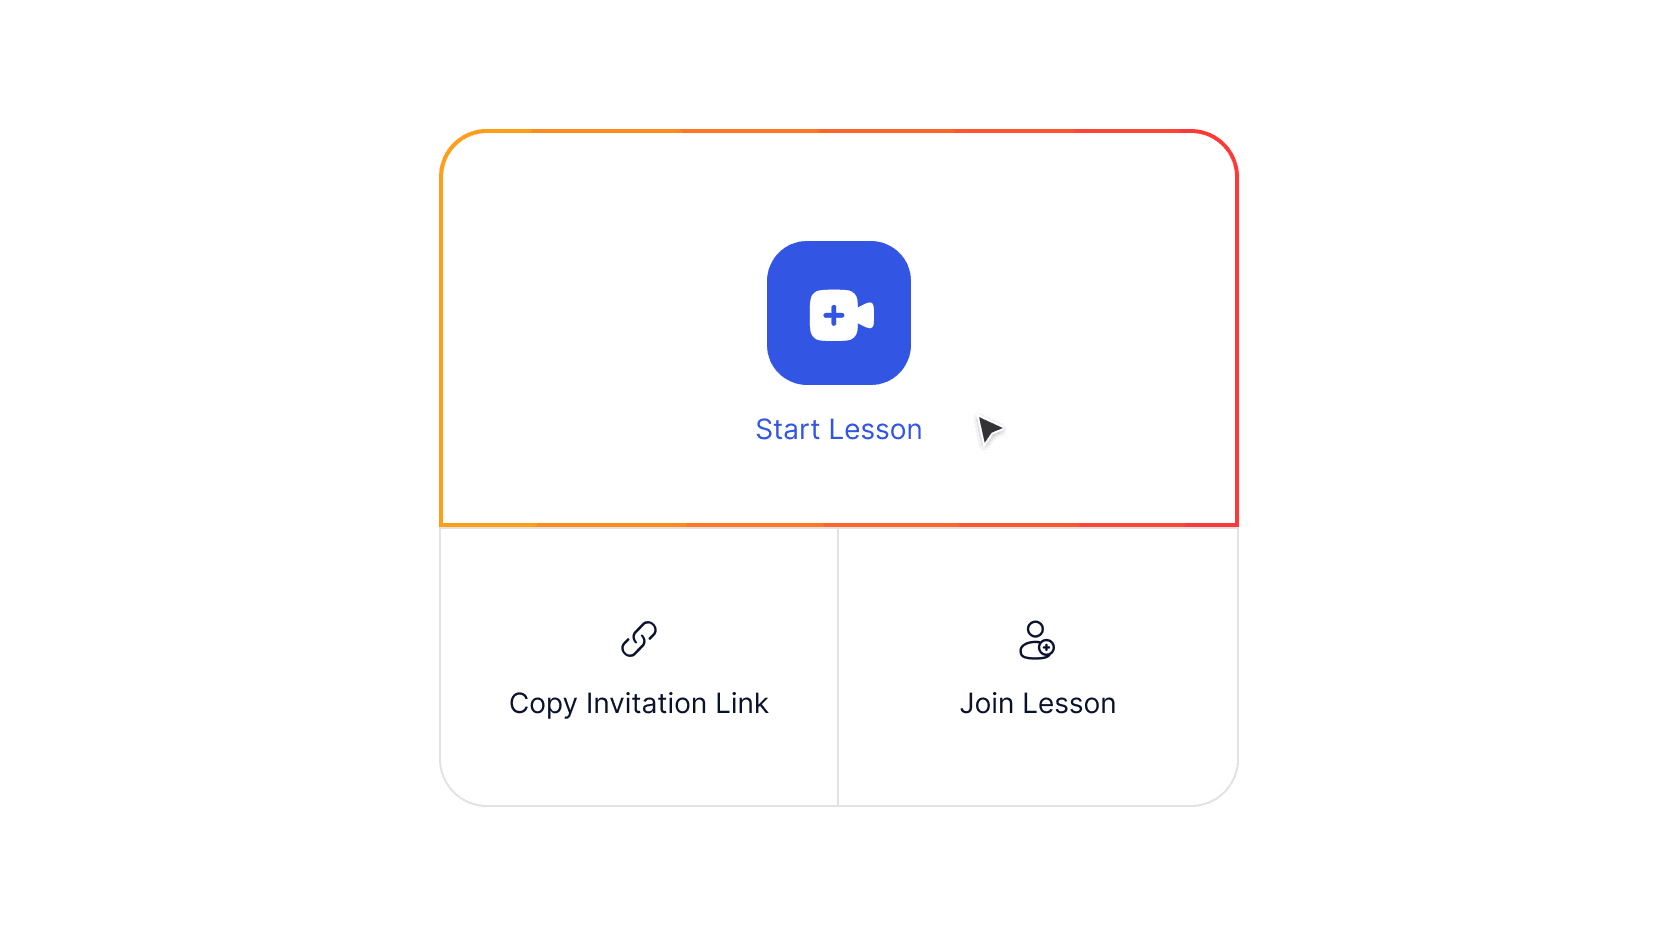
Starting dashboard for the teacher in the MOOZ app
Step 3: Adjust Sound
Click Start Lesson and you will open your personal lesson room. Now you have time to configure your settings and test all tools (your student will join only when they use the Invitation Link you've sent them). After a quick and clear onboarding you’ll see this 👇
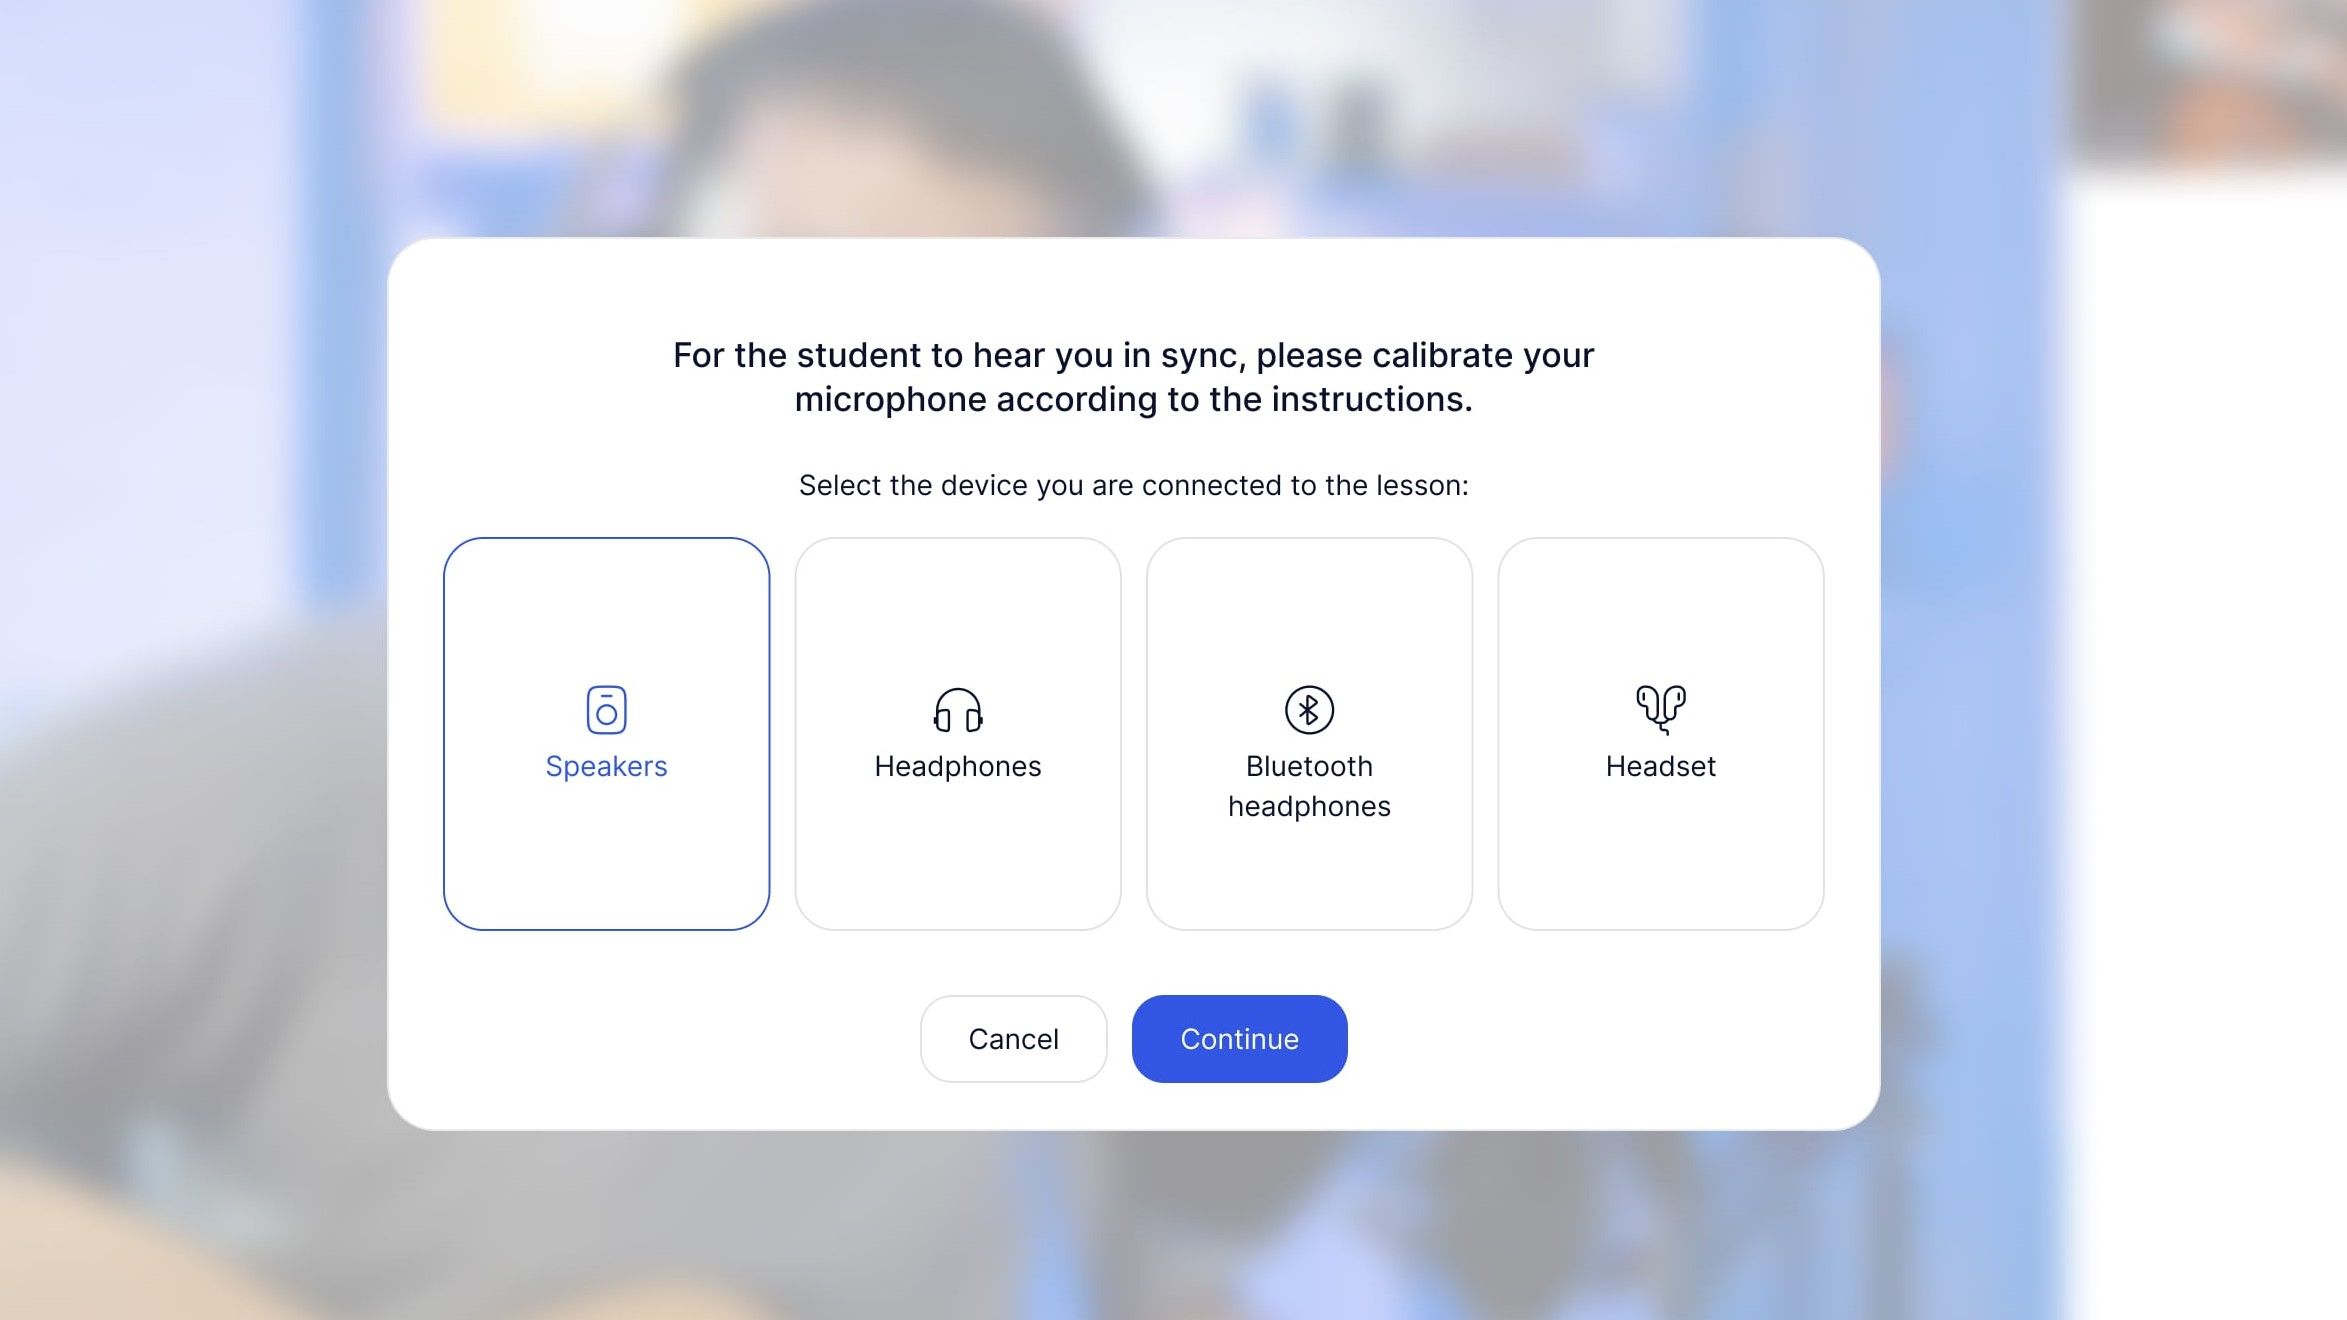
Microphone calibration in the MOOZ app
It’s time to connect your microphone and headphones or headset. Allow microphone access and run sound check.
Now the most important part — microphone calibration. It automatically removes echo and background noise, keeps your volume steady, and stops loud notes from cracking. For music lessons, it's essential — it reduces lag and preserves the full quality of your instrument's sound. Additionally, calibration makes synchronous performance possible — and you feel like you're in the same room.
Choose the option and press Continue. Follow a simple video guide — and complete the calibration.
💡 Both you and your student only need to do this once, the first time you use the app (unless you change your headset/microphone). Make sure your student completes the calibration too and give them a hand with technical issues. To make it even simpler, send them our 1-minute guide “Getting started with MOOZ” before you start.
Step 4: Set Up Video
Allow camera access and select your camera before the lesson. Toggle background blur and choose auto/manual video quality.
Multi-Camera is MOOZ's killer feature and your secret weapon from now on. Set up to 5 cameras to give and get the perfect view.
Add your mobile as a second camera. And here’s a sweet perk for the Apple users: you can connect your iPhone seamlessly — just make sure you’re logged into the same Apple ID and on the same Wi-Fi! Got a device from another brand? No problem! You can easily connect it using just one extra app like Camo or EpocCam.
💡 Control your cameras: select the active one and set your framing. Switch between angles to get the full picture and create a dynamic, studio-quality lesson. Recommend your student to use more than 1 camera, too.
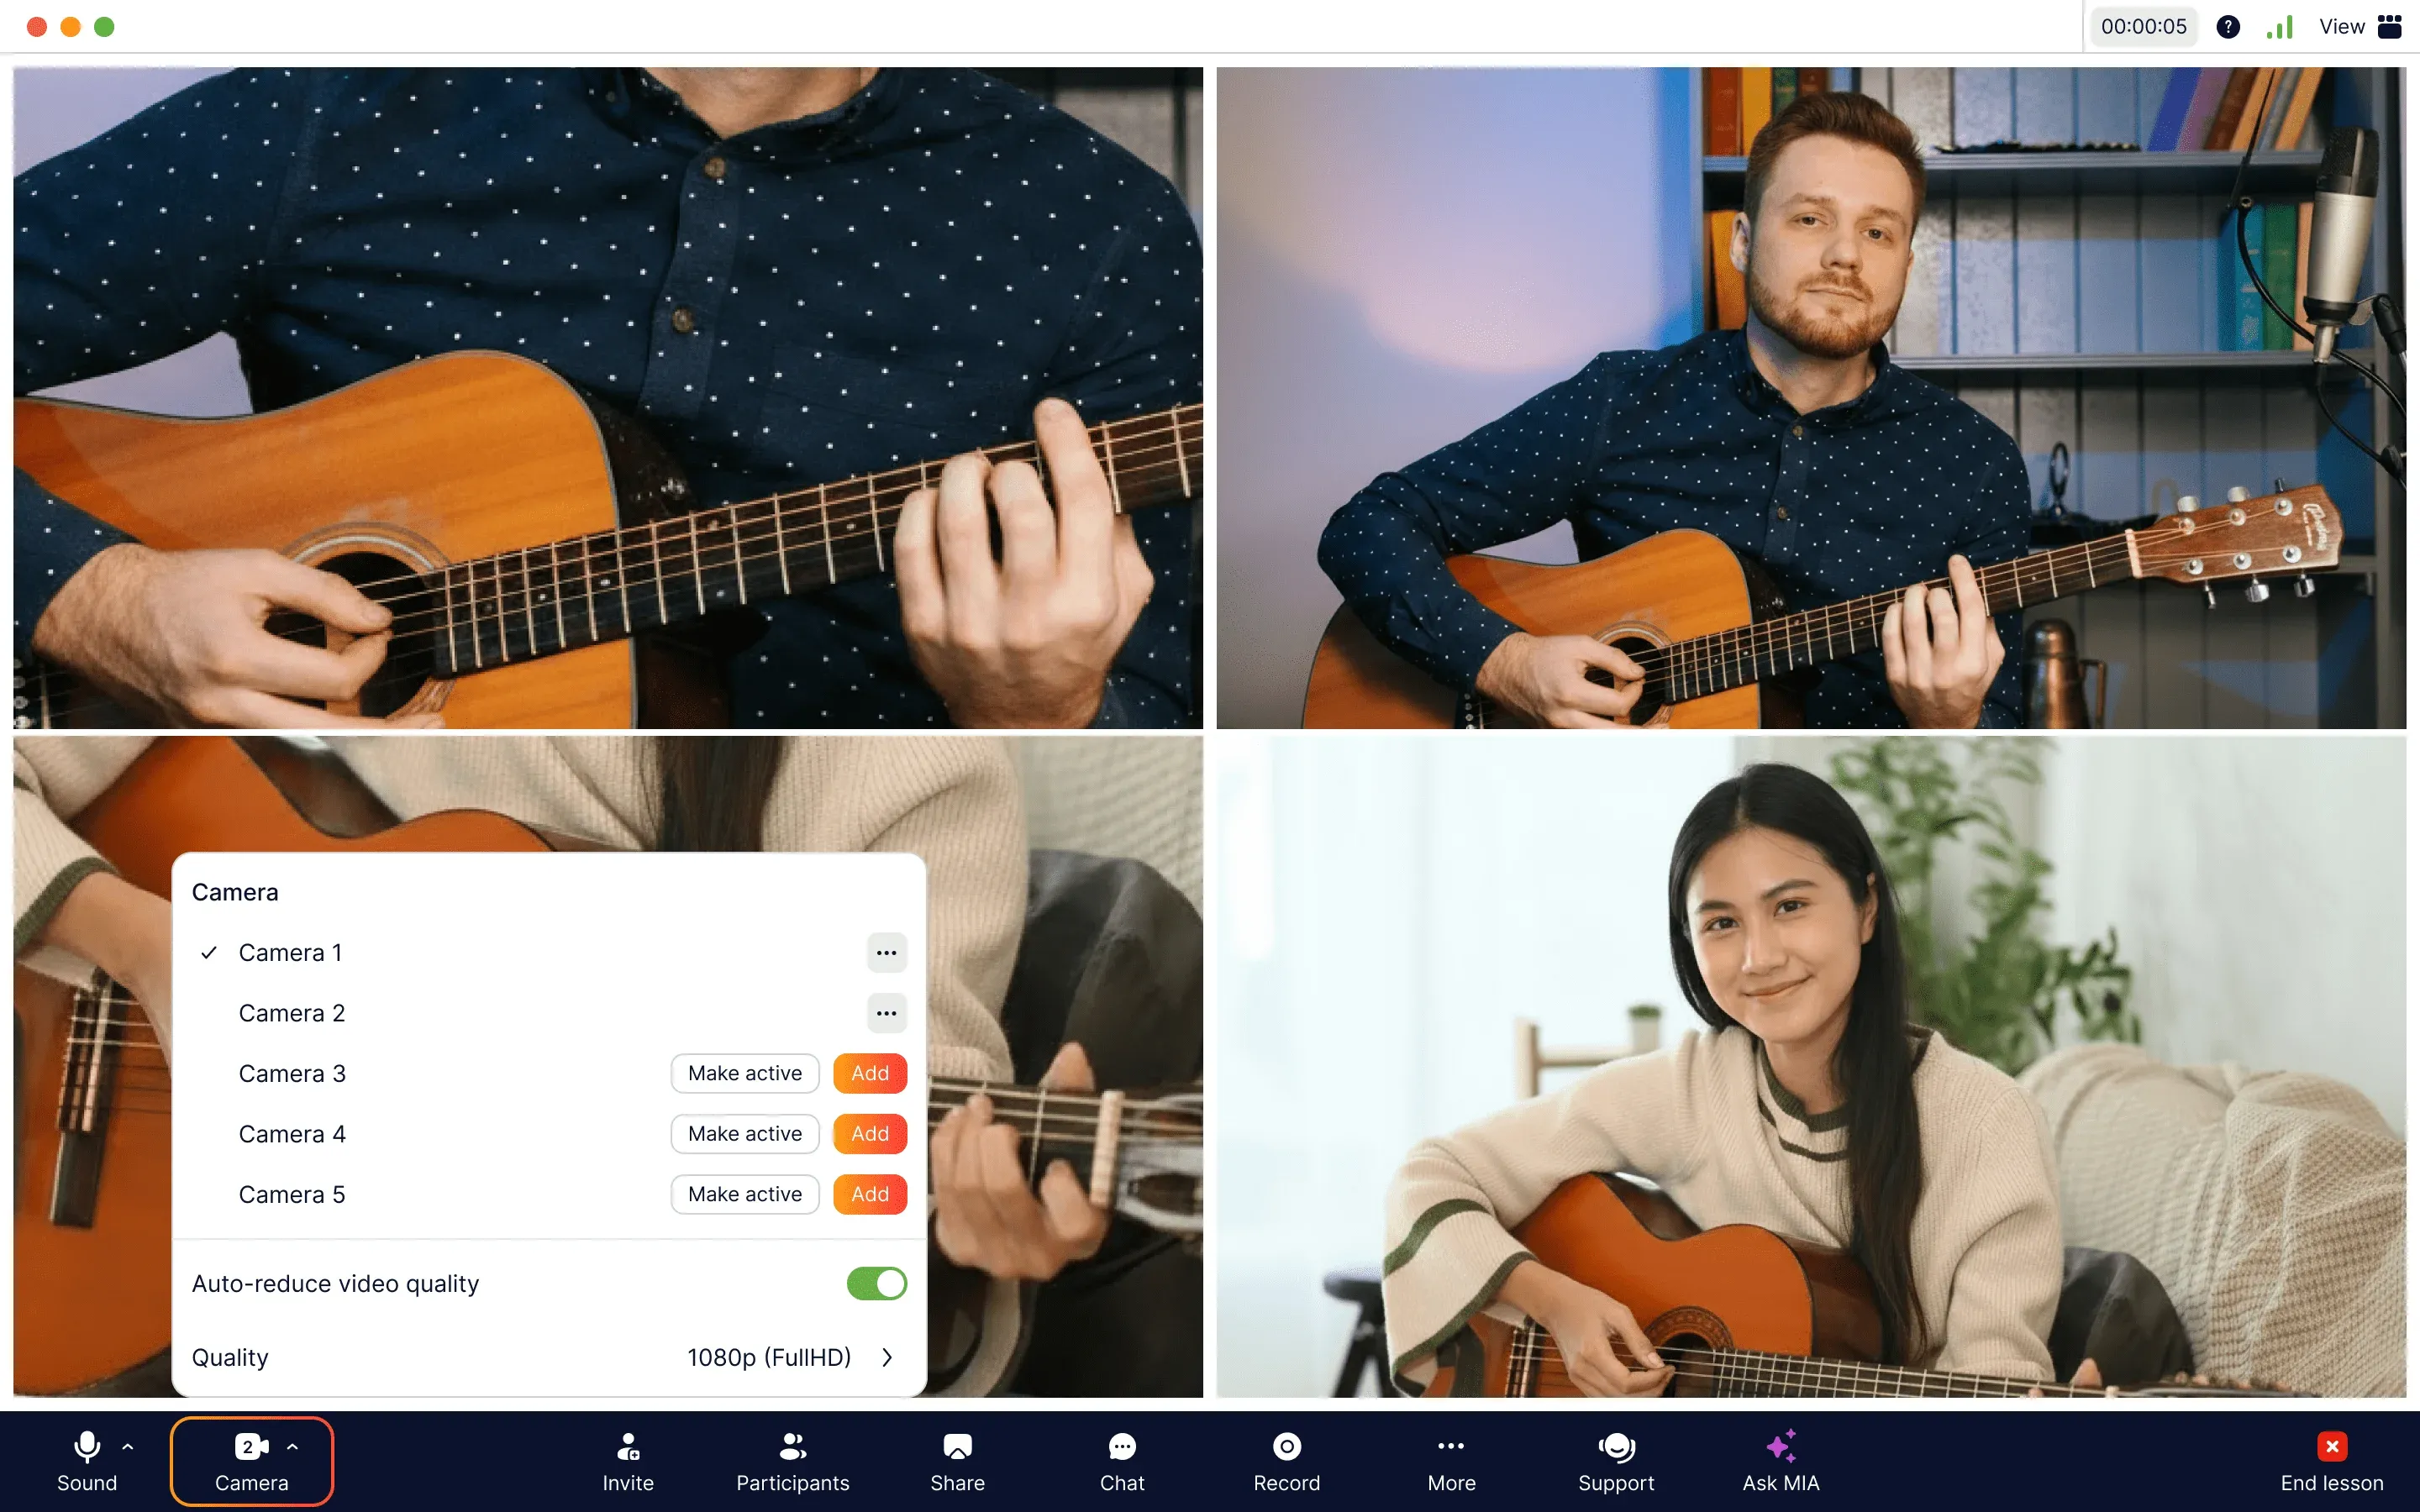
Adding extra cameras in the MOOZ app
Multi-Cam Ideas for Music Teachers
Here’re some ideas how to use 2 cameras 👇
🎹 Online Piano Lessons:
Show one camera on your face for connection and a second, overhead shot of your hands on the keys for technique.
🎸 Online Guitar Lessons:
Set up one camera focused on the fretboard and another on your strumming or picking hand.
🎤 Online Vocal Lessons:
Use one camera for a clear face-to-face connection and a second to show breath control and posture from the side.
🥁 Online Drum Lessons:
Frame one camera on your hands on the snare and toms, and a second on your feet working the pedals.
The only thing left is to decide how to use another 3 cameras! But that’s no big deal for a real pro.
Step 5. Test Built-in Tools
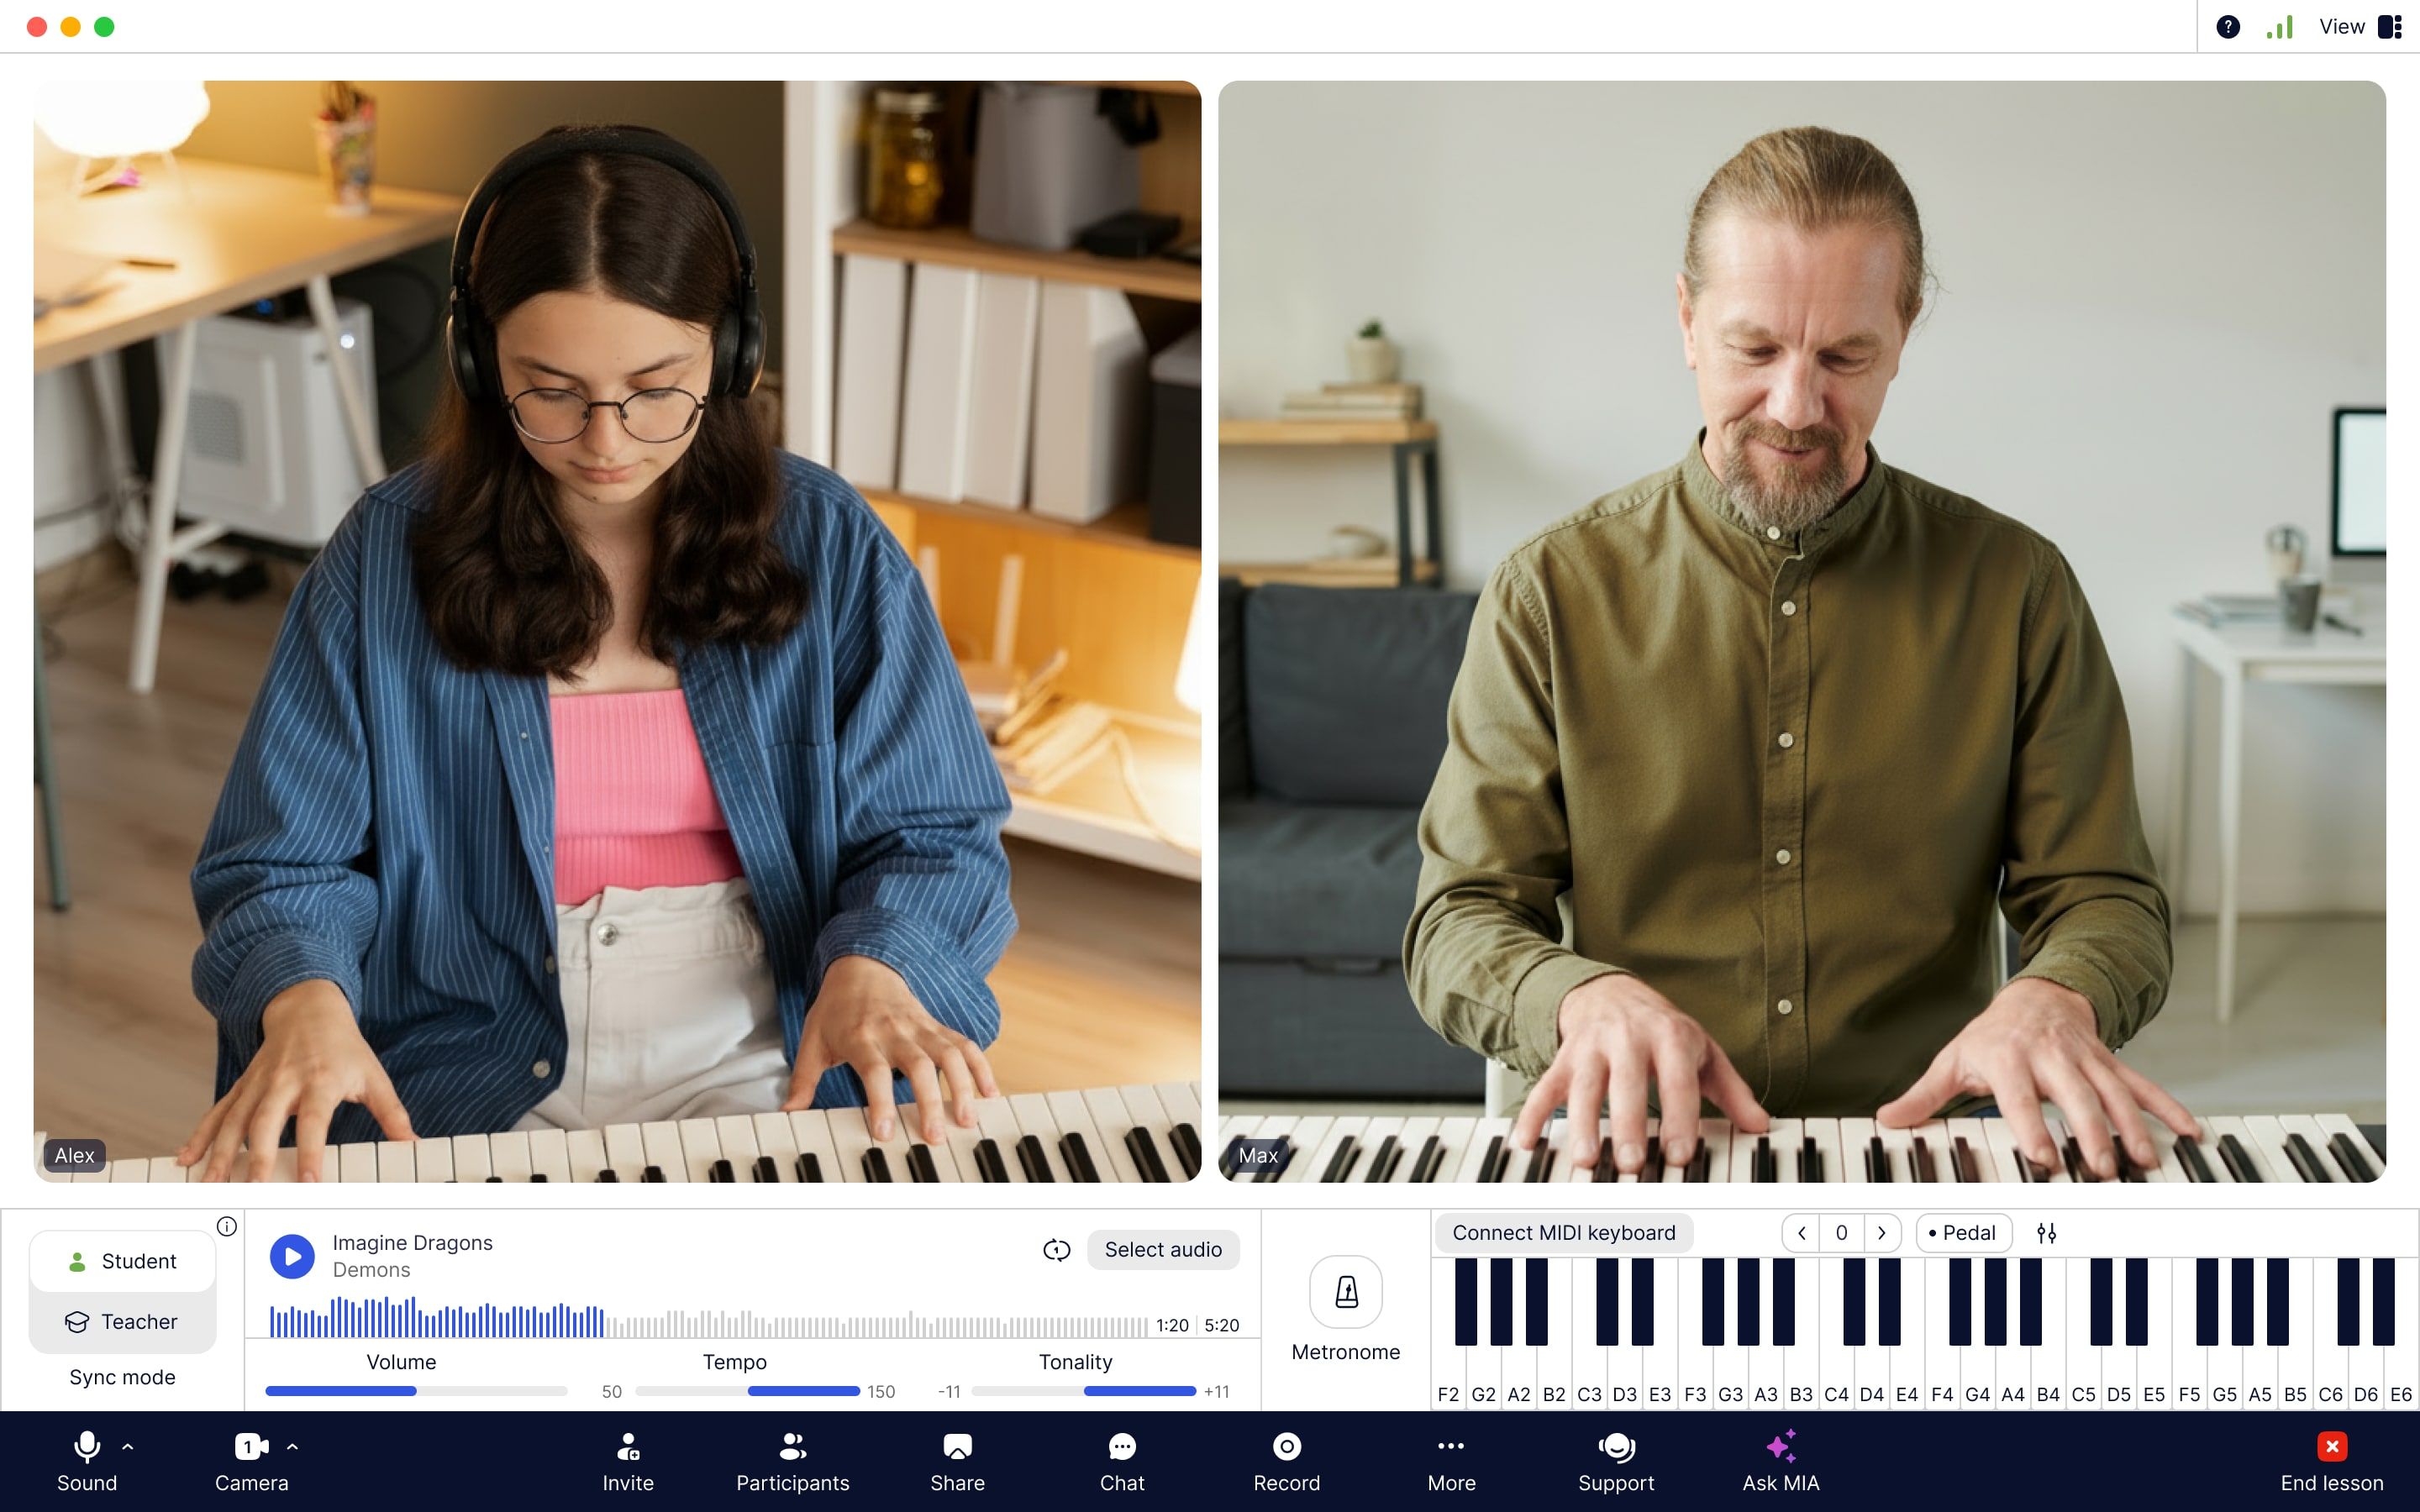
MOOZ app interface with built-in music tools: player, online metronome and virtual piano
💡Easily play audio during your lesson. Start, pause, rewind, loop. Adjust the volume on your side, without affecting the student’s settings.
Music Tools
🔊 Player — to play or sing to backing tracks, do vocal exercises, sing warm up songs and play music games.
🎚️ Metronome — to practice playing in steady time and develop a strong sense of rhythm.
🎹 Digital piano — to play piano online right inside the app and connect MIDI keyboard with no extra gear or setup.
Sync Mode
🌟 And MOOZ’s superstar the Sync Mode — to sound in perfect sync to a backing track, metronome and piano.
Decide who’s going to perform in sync, you or the student.
If you — press Teacher and play the track or piano, or start the metronome.
If the student — press Student and start one of the same tools.
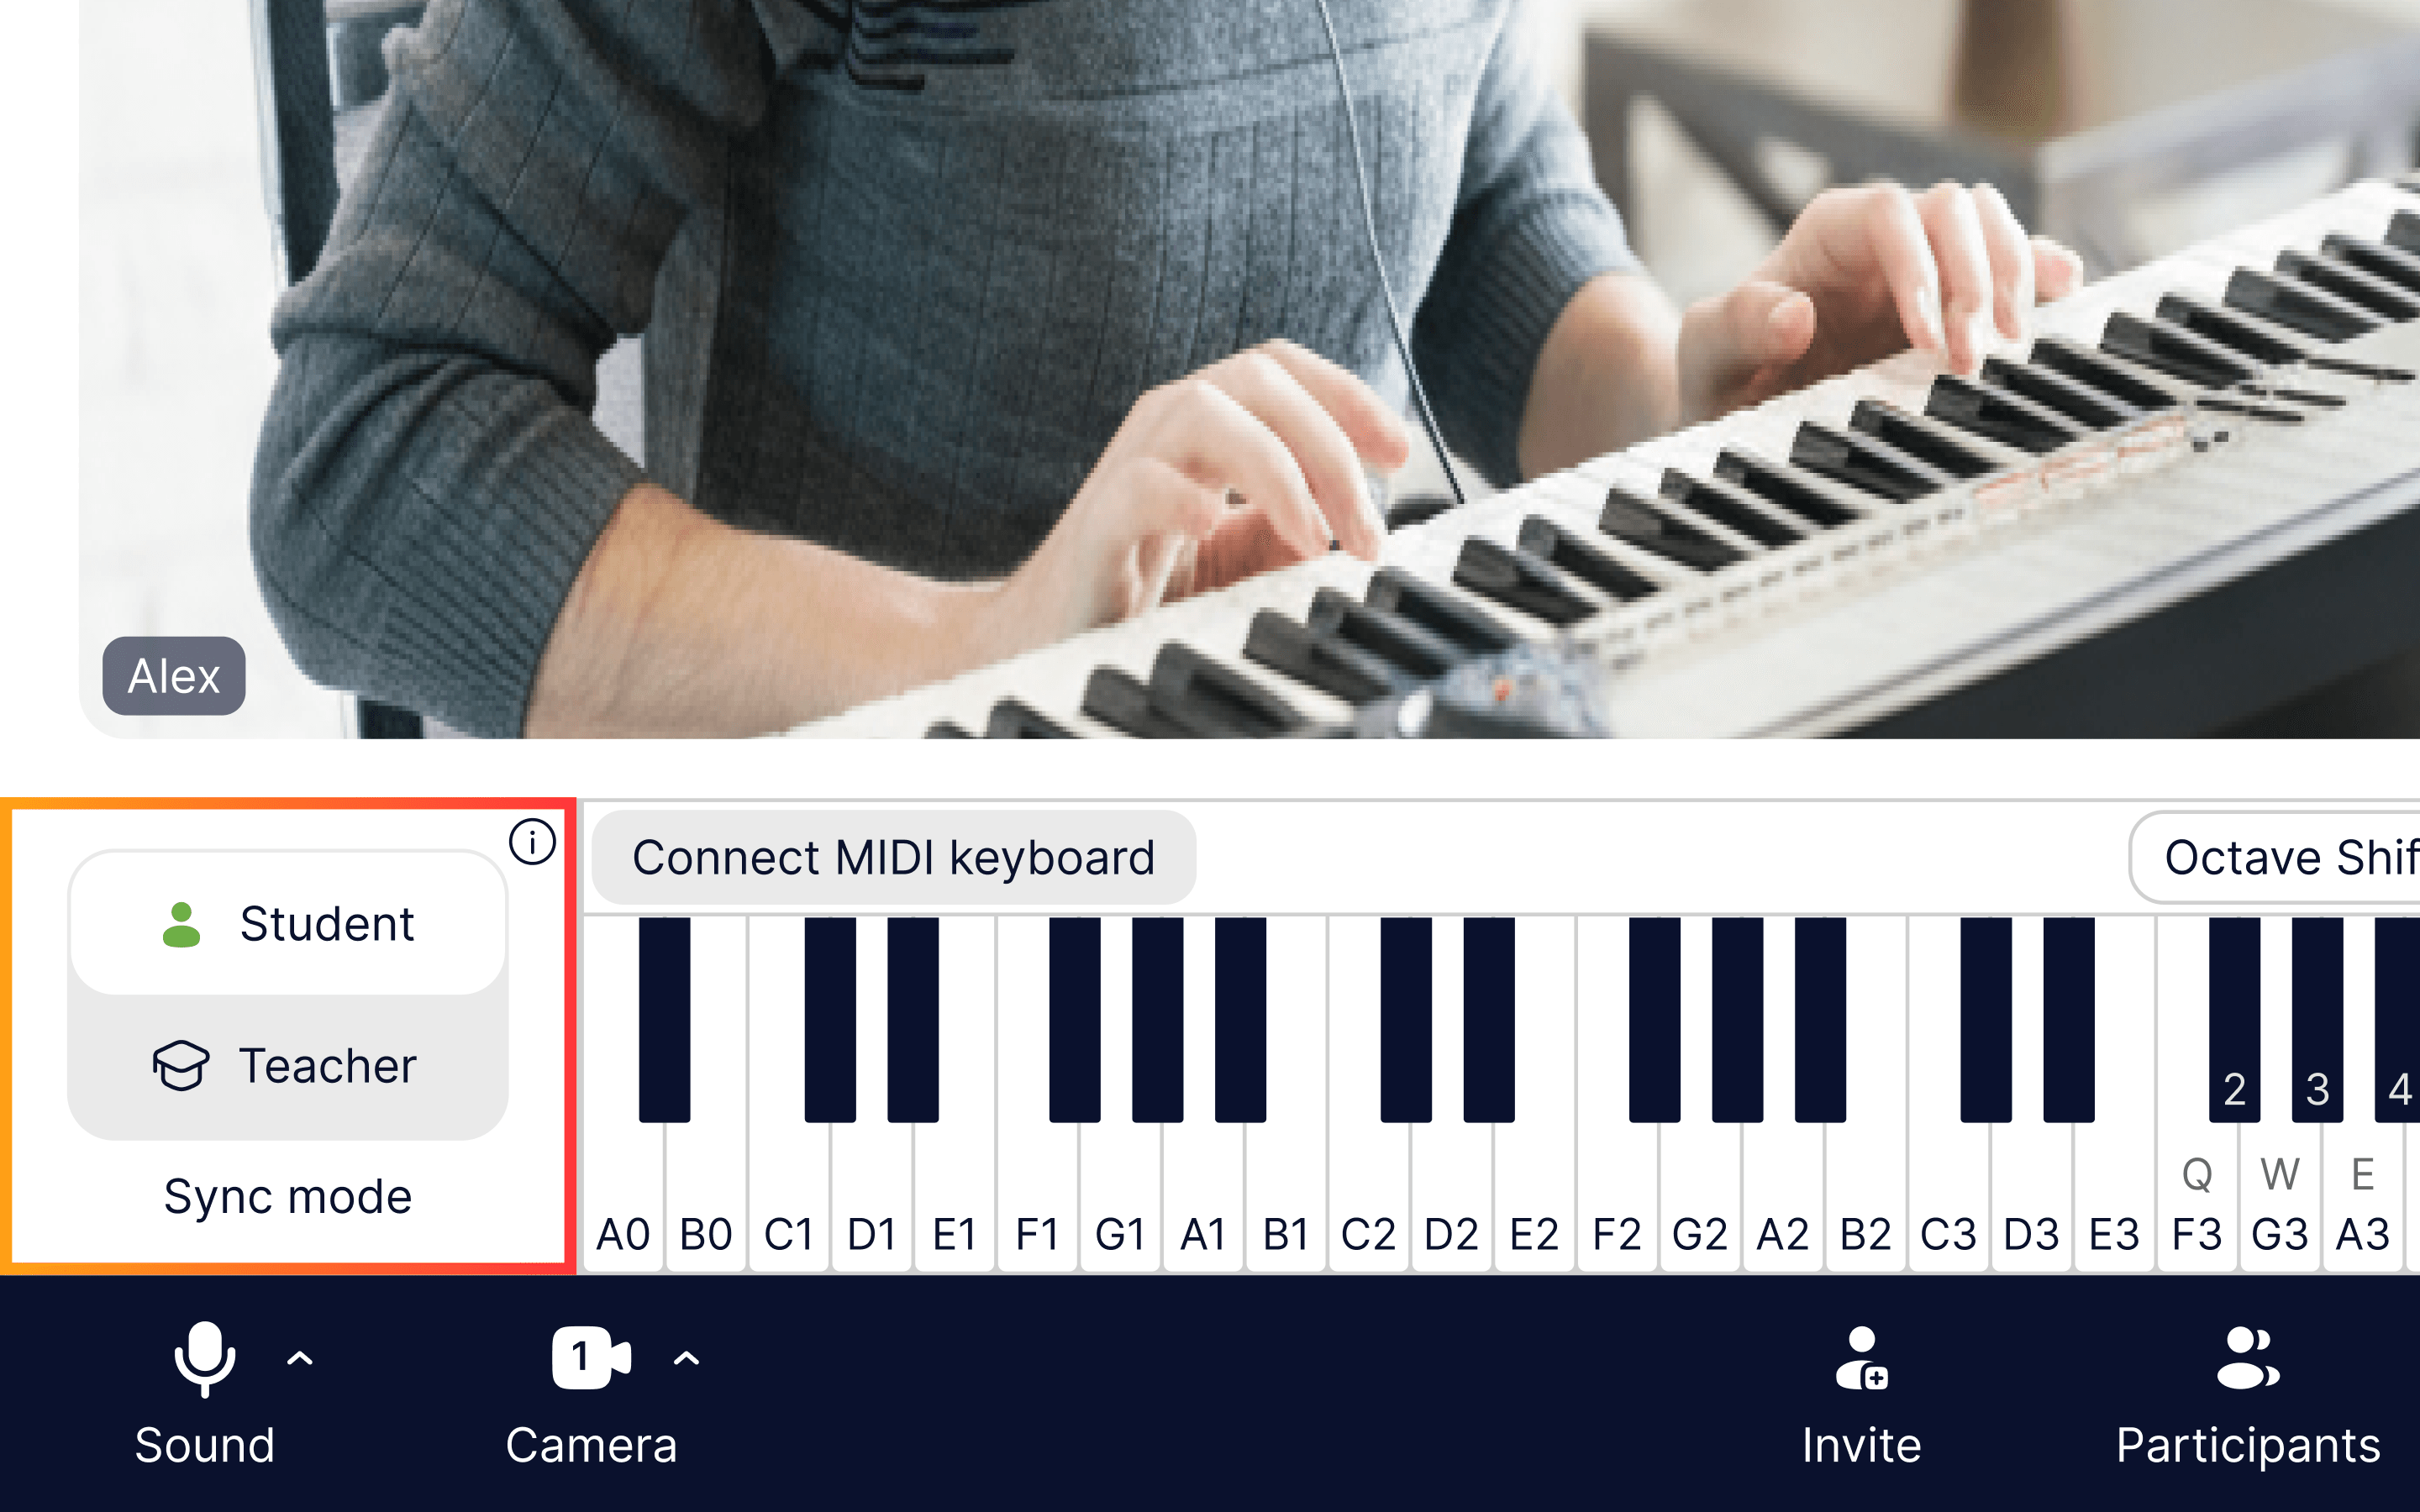
Sync Mode with Student and Teacher buttons in the MOOZ app
Ready! Now you and your student can perform in sync with the track, metronome or piano.
💡 The best way to stay in sync with the piano is for the singer to also be the accompanist. You can demonstrate by playing and singing, and your student can practice the same way.
Kids Mode
If you're a Pro user, all these music tools and features are available for your student, too. And while there’s no problem with adult music lessons or high school students you may need some extra features if you give music lessons for 4 year olds. And our online teaching platform offers you this feature.
To avoid younger students clicking the buttons enable the Kids Mode 👇

Kids Mode in the MOOZ app
💡 Your student can do a sound check, too! Just send them an invitation link beforehand, or make a short 5-minute call to show them the app and its features.
File/Screen Sharing and Drawing Tools
Share your screen and annotate in real time. Perfect for working with sheet music, PDFs, or any lesson materials — simply click Share and mark up documents together with your student as you explain concepts. You can then download the docs with all annotations for rehearsals and personal use in one click.
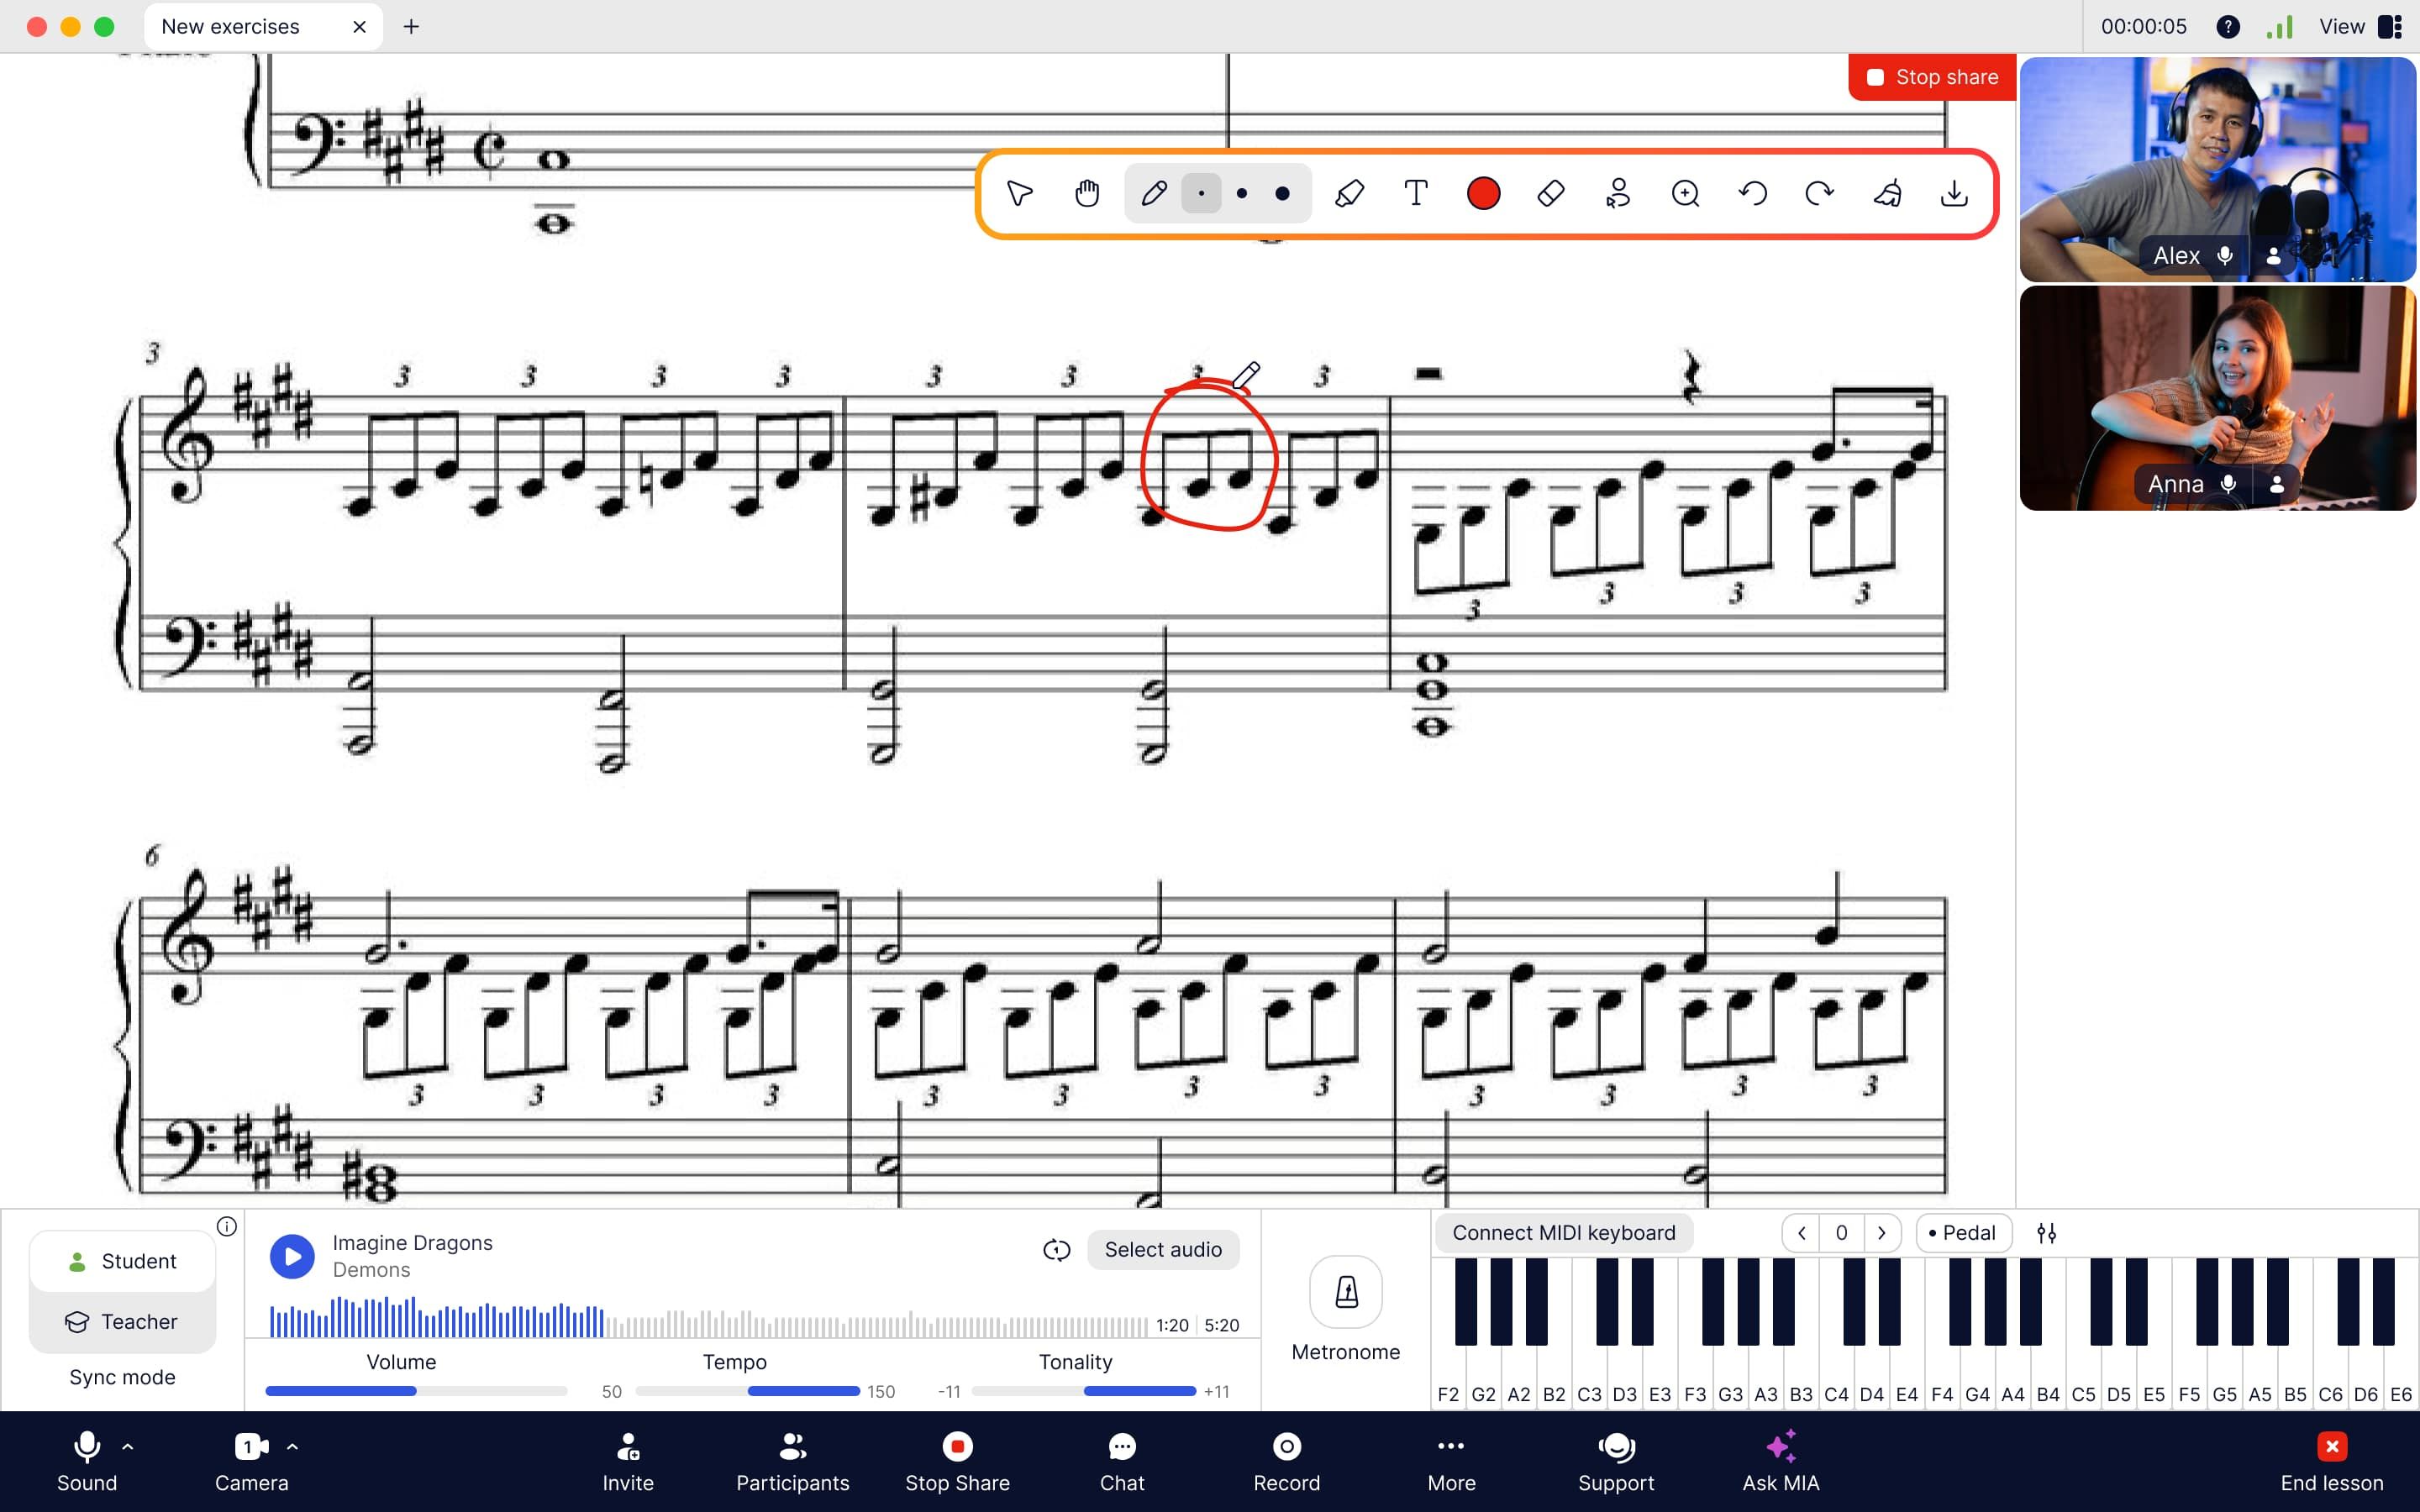
Sharing screen and annotating sheet music in the MOOZ app
Lesson Recording
Don’t just have a great music lesson — preserve it! Hit the Record button to save the entire lesson directly to your device in HD (720p) or Full HD (1080p) quality.
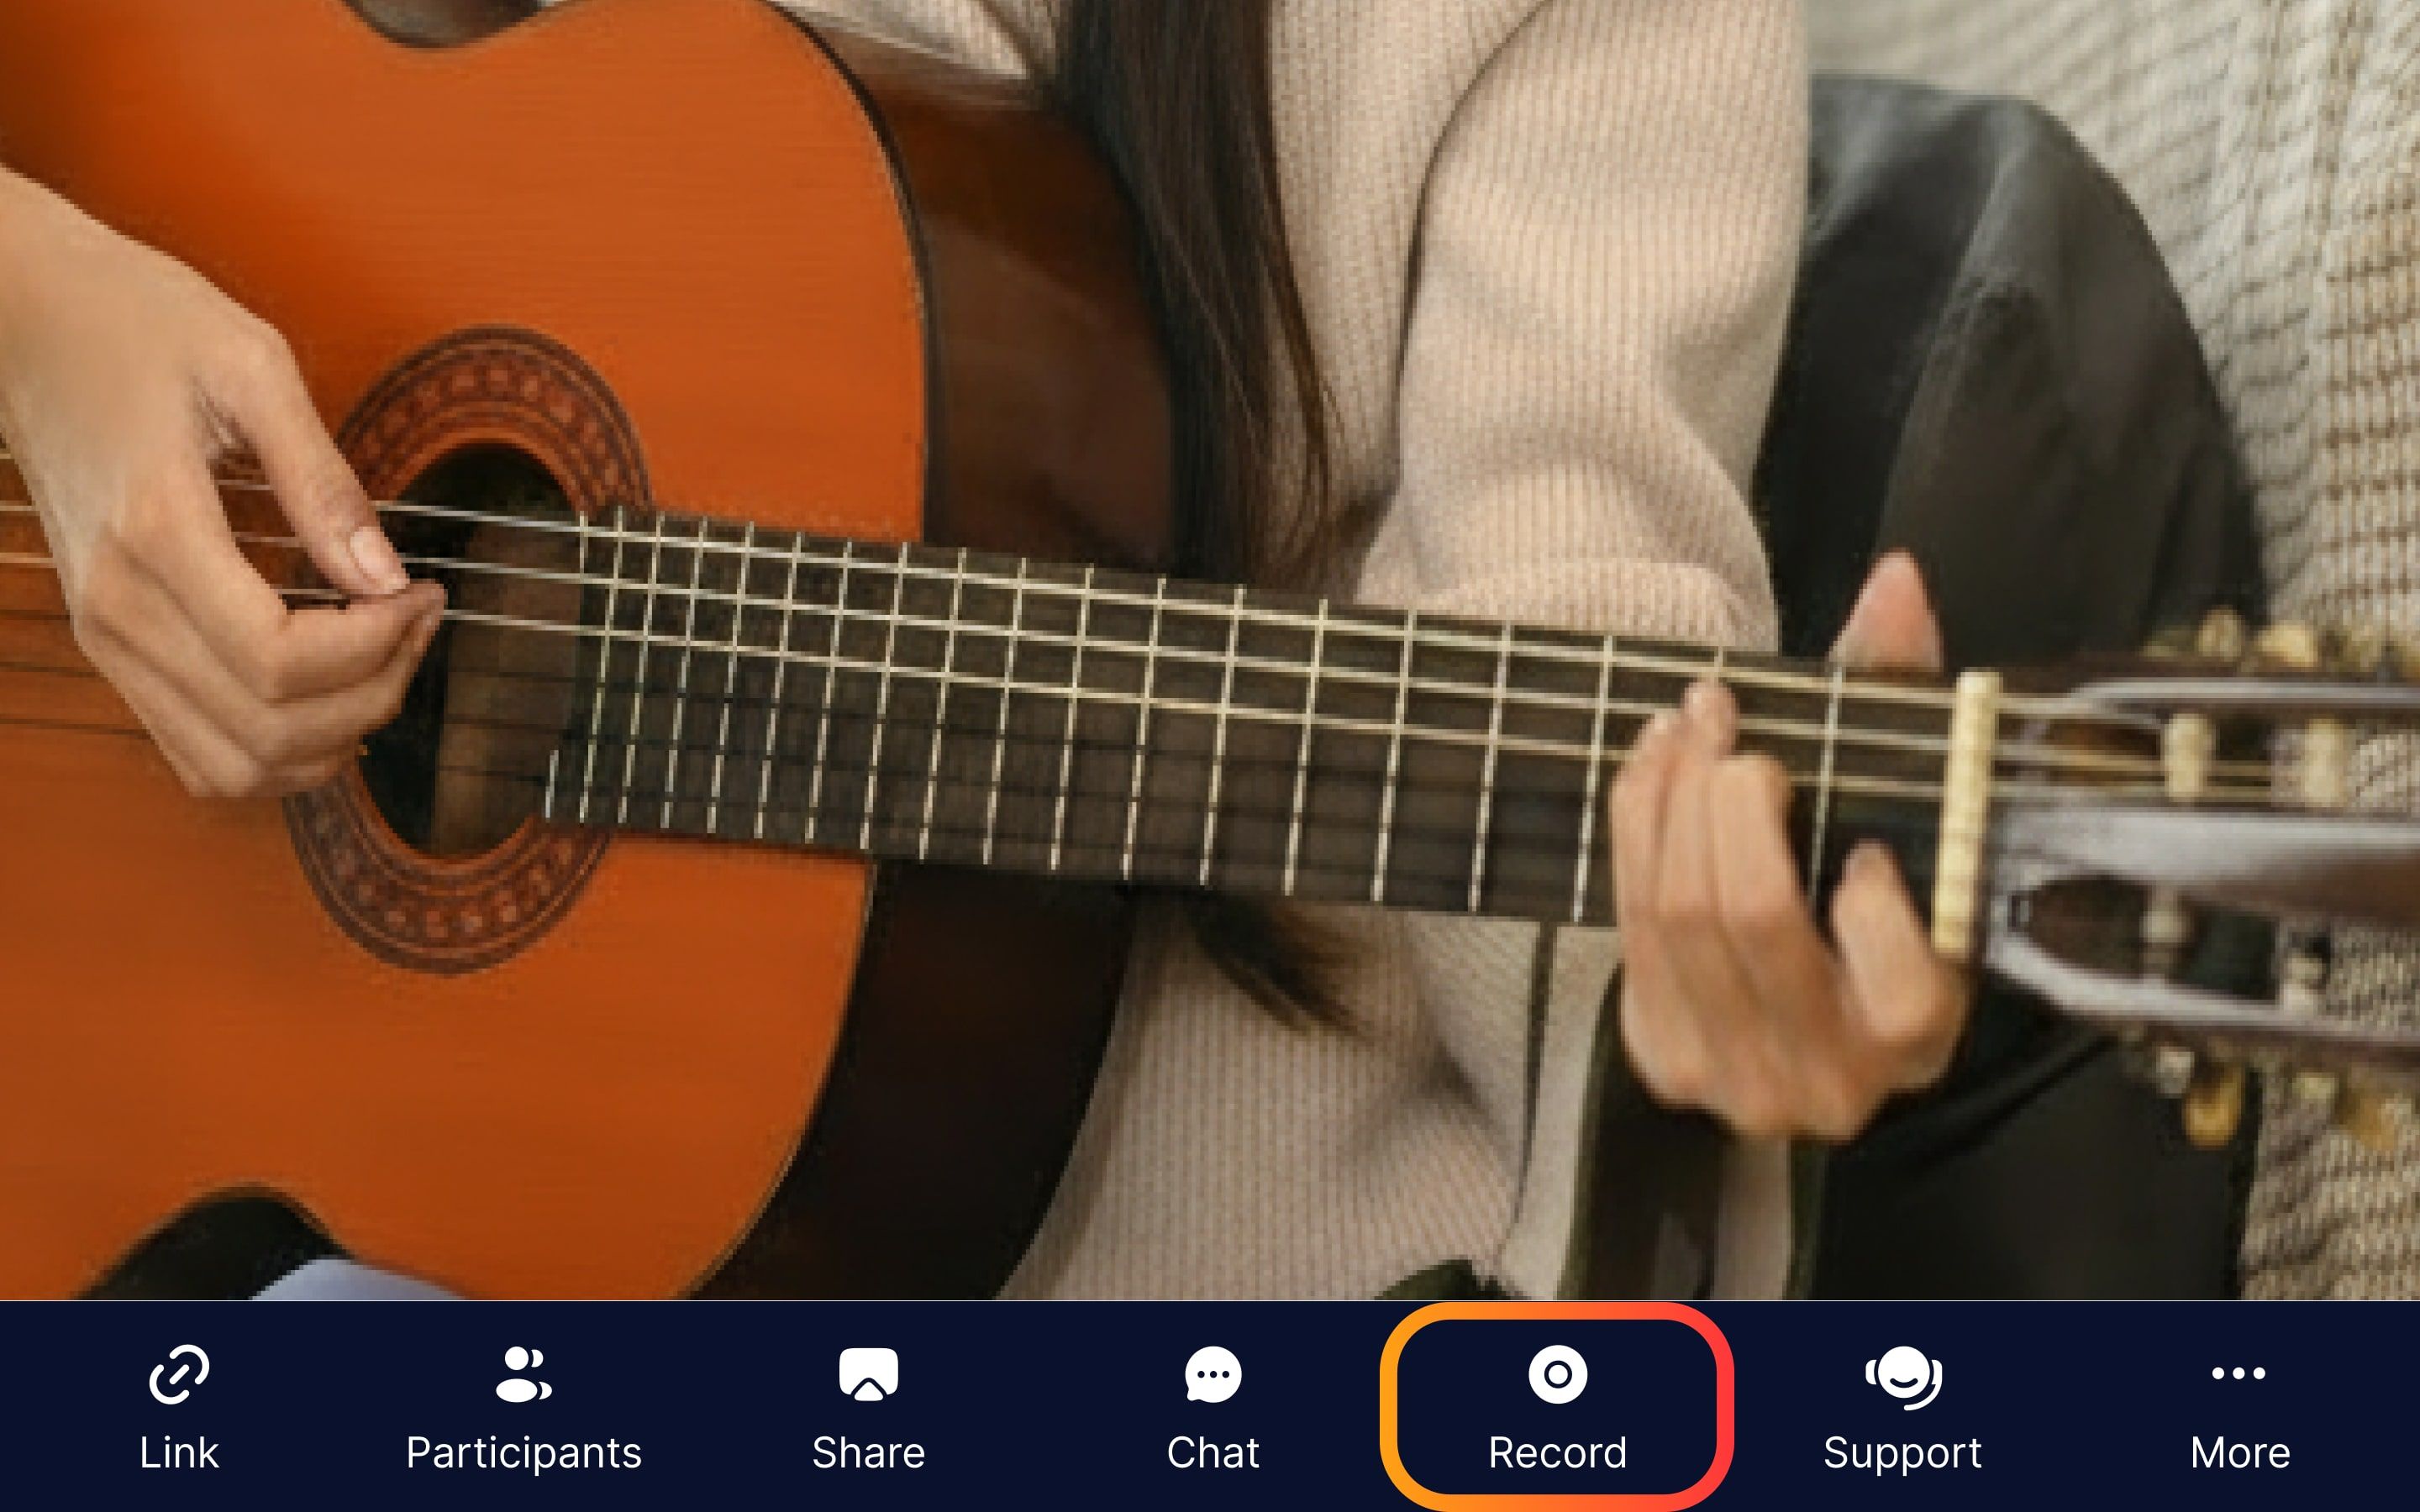
Record button in the MOOZ app — record and save lessons right to your device
💡 Don’t close the app until the recording has finished processing and is fully saved! This gives you and your student a powerful tool for review later.
Track student’s progress in HD: watch them nail that tricky chord for the first time, or finally conquer an old mistake. Turn your lessons from routine into targeted, results-driven sessions.
Recommend your student to rewatch the lesson and write down 1-2 questions while rewatching. You'll both start the next lesson on the same page.
Step 6. Upload Lesson Materials
MOOZ offers you a 2 GB File Storage to keep all the necessary lesson materials like sheet music, backing tracks, etc. Store and access all your teaching materials by clicking the Files button.

2 GB File Storage in the MOOZ app — keep your lesson materials in one place
Step 7. Invite Your Student
The moment has come! You've calibrated the sound, set up the cameras, and prepared your materials. Now it's time to bring it all together and experience the difference of a true online music studio.
Press Copy Invitation Link on the initial dashboard and send it to your student. Your student needs to sign up, download the app and log into their profile, too. Wait for them to join the lesson.

Starting dashboard in the MOOZ app — invite your student
Remind them to complete the microphone calibration! Otherwise you won’t get good quality audio.
💡 New apps can feel a bit scary — why not break the ice with a quick 10-minute intro call? You can guide your student through the app together, so they feel totally comfortable and excited for their first real lesson.
Step 8. Complete Your First Lesson in MOOZ
Once you’re in the lesson, test your mic and speakers to make sure you and your student can hear each other clearly. If you’ve completed the calibration, you shouldn’t have any problems with sound. Just make sure your tech is ok.
- If your student hears background noise — enable Noise cancellation.
- If your voice or instrument cuts out — disable Echo cancellation.
- If you're using headphones — turn both off.
💡 If you're a teacher who also takes lessons, for example, an advanced technique masterclass, you can join another educator’s lesson in MOOZ. Get the Invitation Link from them and press Join Lesson.
Step 9. If You Need Help
Need help setting up or during a lesson? We're here for you!
- Get instant help from MIA, our AI inside the MOOZ app. Ask for warm-ups, games, lesson ideas, or tech setup help — MIA is your AI co-teacher.
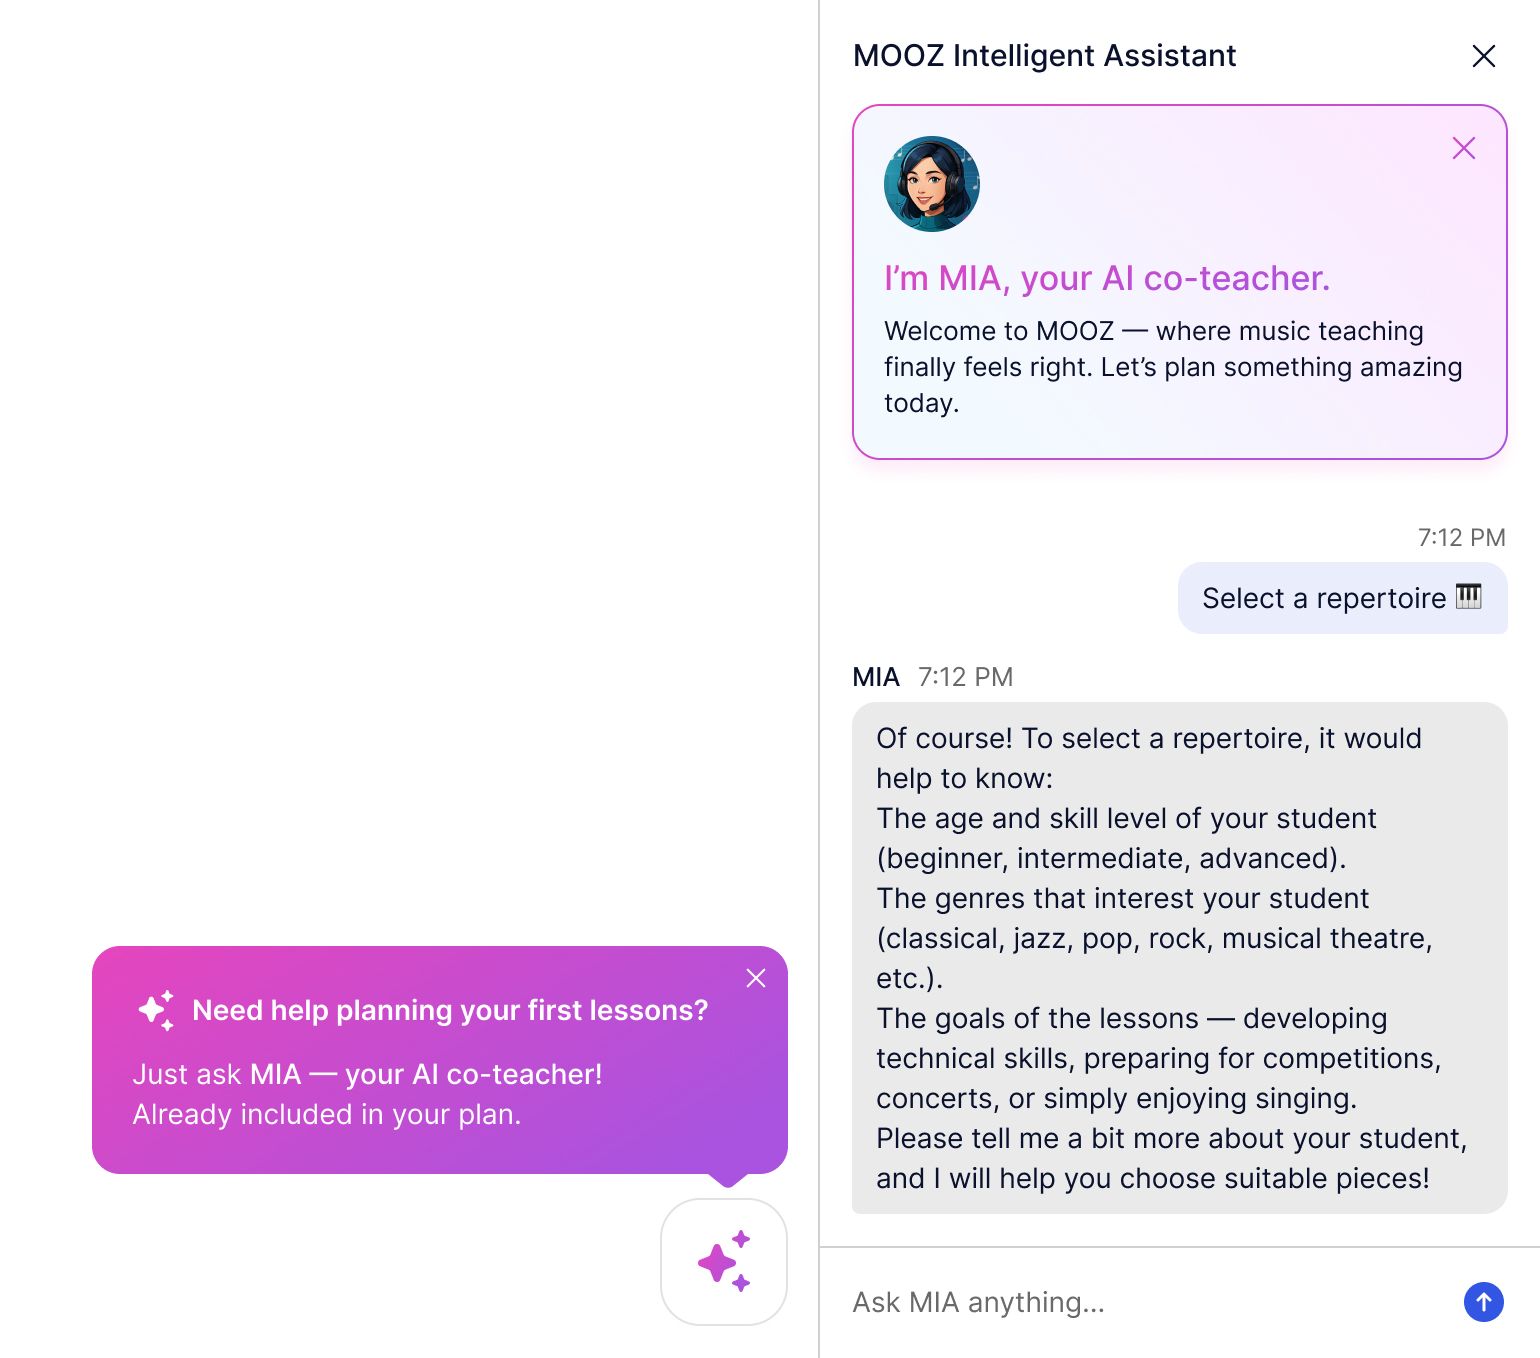
Your Intelligent Assistant MIA is always ready to help in the MOOZ app
Got a complex issue or want to chat with someone real?
- Contact our friendly support team! No bots, just humans who know MOOZ.
Want to see MOOZ in action first?
- Drop into our free weekly webinar! A MOOZ ambassador and an experienced guitar teacher will show you the ropes of the app. Plus, get real-time tips from our teaching community!
- Attend a group demo with our team! We’ll guide you through every step and show you exactly how MOOZ fits your lessons.

Related Articles

Synchronization in Online Music Lessons: A Complete Breakdown
Learn how tech fixes internet latency. Make synchronous music today!
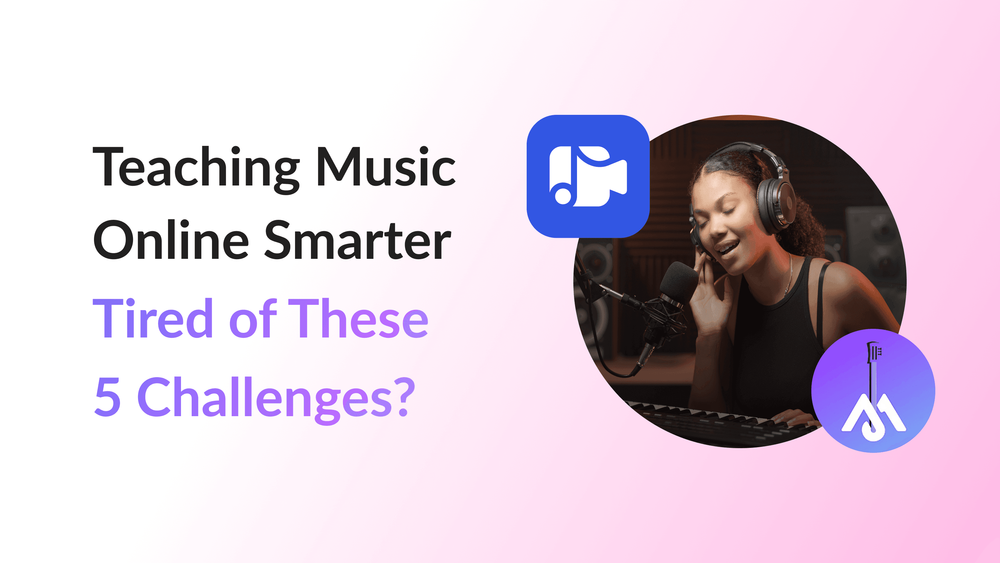
Guide to Teach Music Online Smarter: MOOZ & Moosiko Insights
Learn how to solve the 5 biggest online teaching challenges that are costing you time and students.
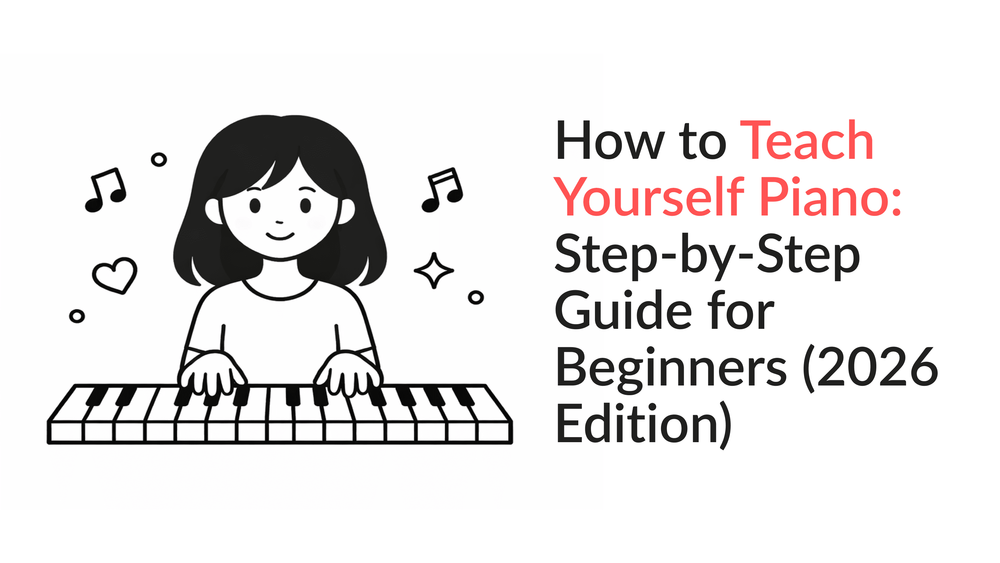
How to Teach Yourself Piano: Step-by-Step Guide for Beginners (2026 Edition)
Learn how to teach yourself piano in 2026 with this complete step-by-step guide for absolute beginners. Master keyboard piano chords, scales, posture, and play your first real songs in just weeks — no teacher required. Includes free apps, daily practice routine, and the best resources of 2026.